As a BJD collector for over 15 years, I’ve seen countless dolls come and go, and one truth remains constant: the longevity and posing stability of your cherished BJD hinge on diligent BJD joint maintenance. It’s the bedrock of a long and happy life for your doll, allowing them to hold those perfect poses you envision.
This guide isn’t just a “how-to”; it’s a deep dive into understanding, preventing, and resolving joint issues, offering you the control and peace of mind every BJD owner deserves. Neglecting joint care doesn‘t just lead to a floppy doll; it can lead to irreversible wear, stress cracks, and the heartbreaking loss of your doll’s core ability—to express life through pose. We’ll explore everything from the fundamental mechanics of your doll’s anatomy to advanced repair tips, ensuring your doll remains a stunning centerpiece for decades.
1. Understanding Your BJD’s Anatomy: Beyond Just a “Joint”
Before we can effectively tackle BJD joint maintenance, we need to truly understand what we’re working with. Your doll’s joints are intricate systems, not just simple connections. Grasping their design and the forces at play is the first step toward proactive care.
Types of Joints & Their Unique Characteristics
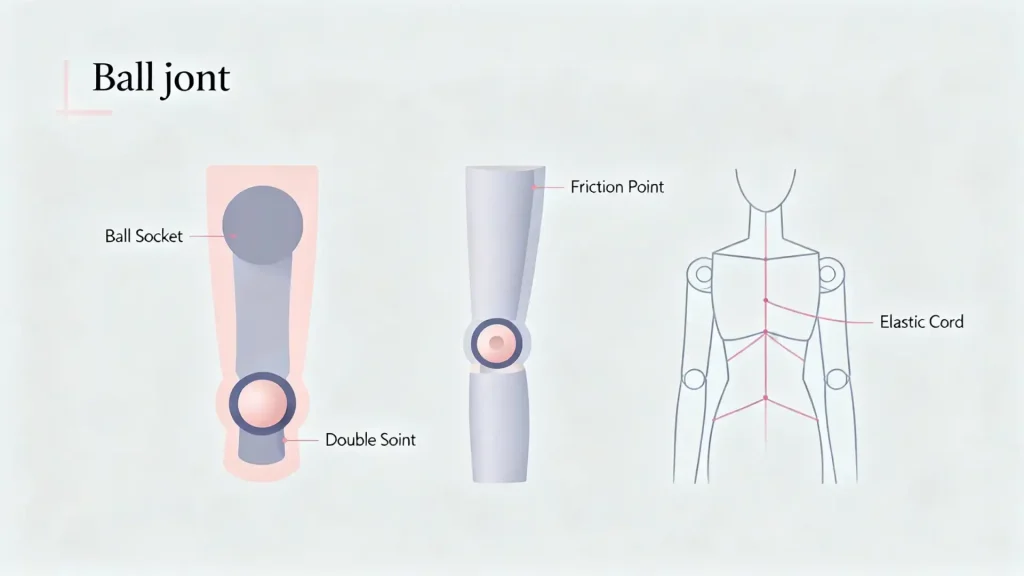
BJD joints come in various forms, each with its own strengths and quirks. The most common are the classic ball joints, which offer a wide range of motion but can be prone to loosening if not properly maintained. Many modern BJDs feature double joints (like those found in knees and elbows) or even triple joints (often in wrists or ankles).
These multi-jointed designs enhance realism and posing flexibility, allowing for more natural bends and deeper angles. However, this increased articulation often means more points of friction and potential wear. For instance, a double-jointed knee has two points of rotation that must work in harmony, and if one becomes loose, the entire limb’s stability can be compromised.
Different manufacturers, like Volks, Luts, or Dollfie Dream, often have subtle variations in their joint designs and resin compositions, which can affect their inherent stability and how they respond to various BJD joint tightening methods.
Why Joints Loosen: The Science Behind the Sag
The dreaded “sag” or inability to hold a pose is a common frustration, and it’s rarely due to a single factor. Understanding the “why” is crucial for effective BJD joint care guide strategies.
Firstly, material wear is inevitable. Most BJDs are made from polyurethane resin, a durable but not indestructible material. Over time, the constant friction of ball joints rubbing against their sockets, especially during posing, causes microscopic abrasion. This wear slightly reduces the size of the ball or enlarges the socket, decreasing the necessary friction for stability. Some older dolls or those made with different materials like ABS plastic might exhibit different wear patterns.
Secondly, environmental factors play a significant role. Extreme changes in humidity and temperature can cause the resin to expand and contract, subtly altering joint fit. Don‘t forget the internal elastic! Heat and humidity are its enemies, causing it to stretch and lose tension. More critically, prolonged exposure to UV light can degrade the resin, making it brittle and more susceptible to wear.
Finally, posing habits contribute significantly. Constantly forcing a doll into extreme or unnatural poses puts undue stress on the joints. Gravity is a relentless force; if a doll is left in a pose that requires significant joint tension for extended periods, the joints will gradually give way. This is why understanding the physics of friction and leverage is key to preventing premature loosening. In my 15 years, I’ve found that dolls frequently posed in dynamic, gravity-defying stances often require more frequent BJD joint maintenance than those displayed in more relaxed, seated positions.
2. Your Proactive BJD Joint Care Guide: Prevention is Always Better
An ounce of prevention is worth a pound of cure, especially when it comes to your BJD’s joints. Proactive care can significantly extend the life of your doll’s posing ability and reduce the need for extensive BJD joint repair tips.
The Golden Rules of Handling and Posing
Treat your BJD with the same care you would a delicate antique. Always handle your doll gently, supporting limbs and joints as you move them. Avoid yanking or twisting limbs forcefully. When posing, aim for even weight distribution and avoid extreme, gravity-defying poses for prolonged periods. If a pose looks unstable, it probably is.
Consider using a doll stand for any pose that puts significant stress on the joints, especially for standing displays. Remember, the goal is to minimize unnecessary friction and stress on the resin.
Climate Control: Humidity, Temperature, and UV’s Hidden Impact
Your doll’s environment is a silent partner in its long-term health. Maintain a stable environment with moderate humidity (ideally 40-60%) and temperature. Avoid direct sunlight or placement near heat sources like radiators or vents. UV light is the enemy of resin, causing yellowing and brittleness, which can weaken joints. For an in-depth guide on creative and safe long-term solutions, read our ultimate BJD storage guide.
If your doll is displayed near a window, consider UV-filtering film or curtains. Proper climate control also helps preserve the elasticity of the internal stringing, preventing the need for premature BJD elastic replacement.
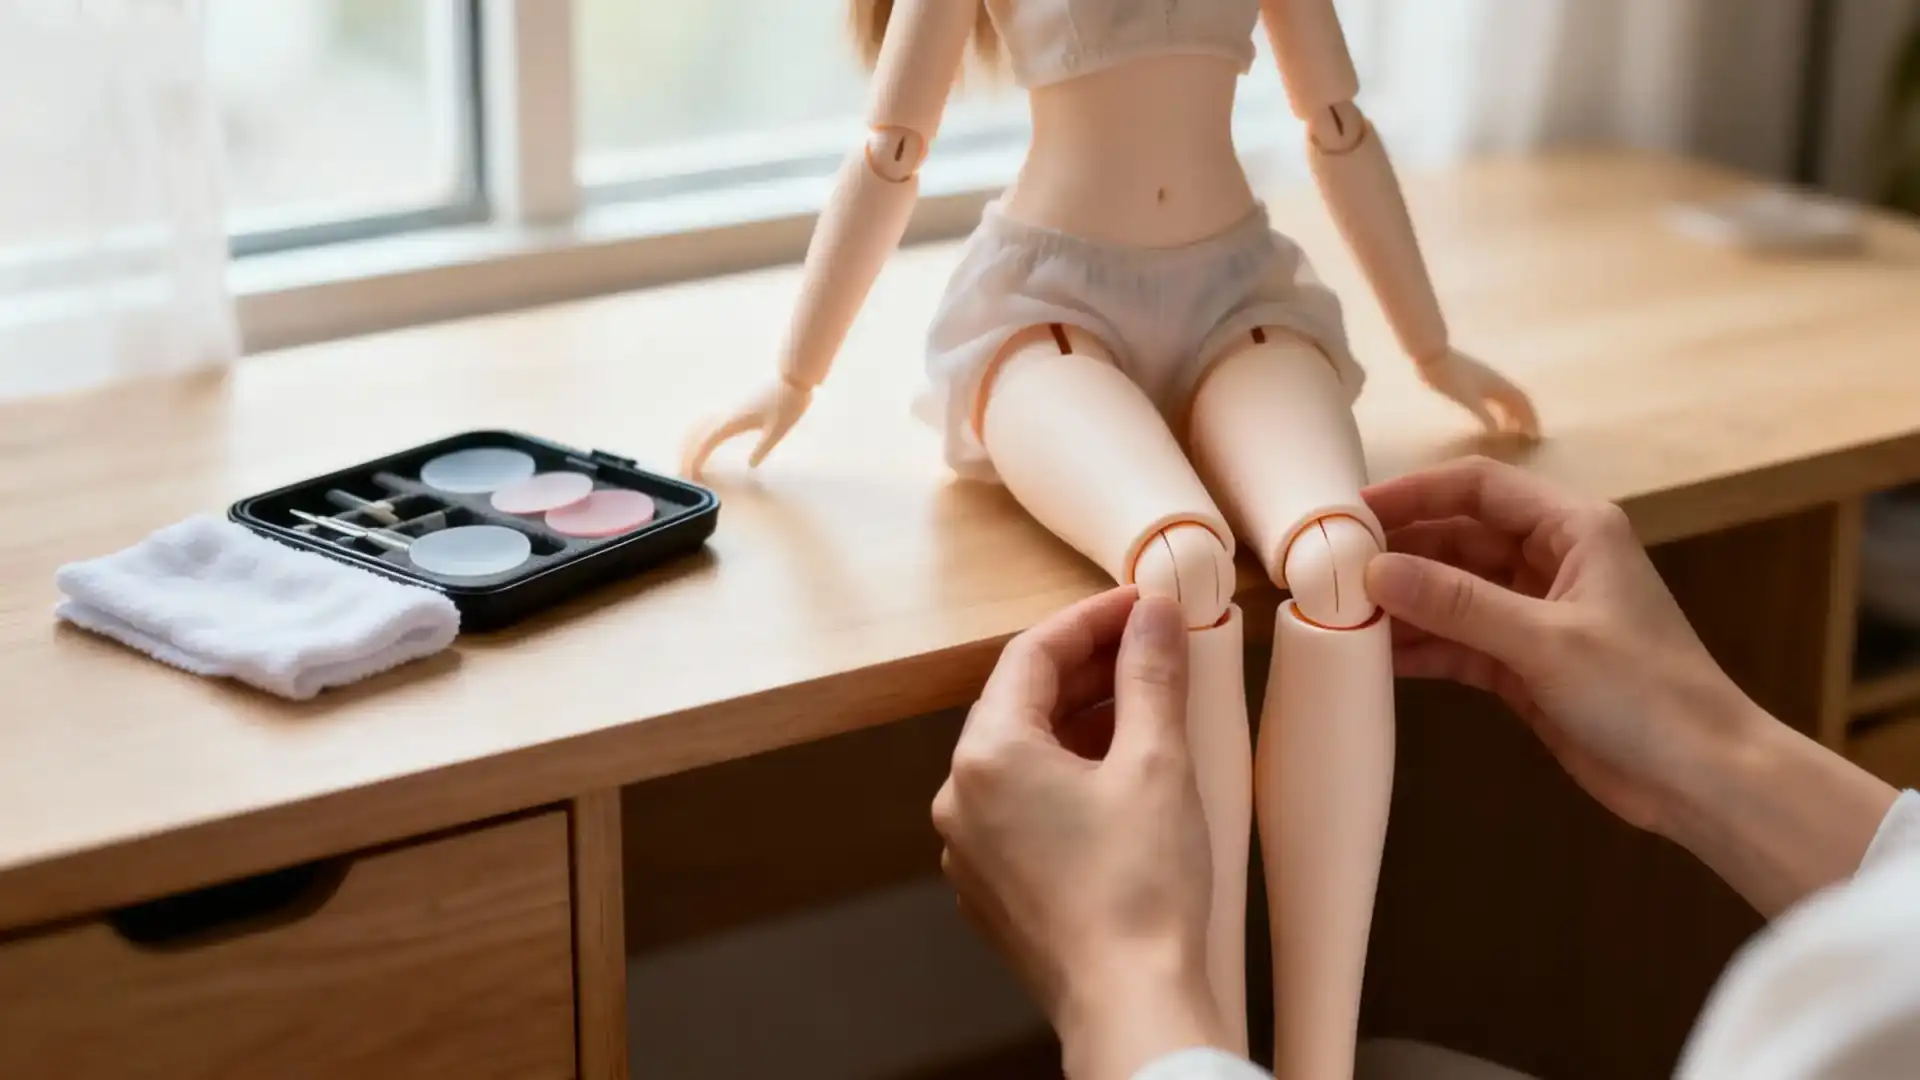
Regular “Check-up” Routine: What to Look For and How to Feel
A consistent BJD doll maintenance schedule is your best defense. I recommend a quick check-up at least once a month, or whenever you change your doll’s outfit or pose.
Here’s a checklist for your routine inspection:
- Visual Inspection:
- Check for any visible cracks or stress marks around joint sockets, especially in high-stress areas like knees, elbows, and neck.
- Look for signs of resin yellowing, particularly on lighter skin tones, which can indicate UV exposure or aging.
- Examine the joint balls for excessive shine or flattened areas, which are signs of wear.
- Inspect the stringing visible through the neck or limb openings. Is it frayed? Does it look stretched or discolored?
- Tactile Inspection:
- Gently manipulate each joint. Does it feel loose or wobbly? Does it hold its position when you let go?
- Listen for any squeaking or grinding noises. Squeaks often indicate dry friction, while grinding might suggest resin-on-resin wear.
- Feel the overall tension of the doll. If the limbs feel overly floppy or the doll struggles to stand, the internal elastic might be losing its tension, signaling a need for BJD stringing guide consultation.
For visual examples of what to look for, you can often find helpful video tutorials online that demonstrate common joint issues and their initial diagnosis. (A visual guide comparing a smooth, new joint ball versus a worn, shiny one would be placed here for clarity.)
3. How to Fix Loose BJD Joints: Step-by-Step Tightening Methods
When prevention isn’t enough, or you acquire a doll with existing looseness, several effective BJD joint tightening methods are at your disposal. These range from simple, reversible solutions to more permanent interventions.
Choosing the Right Method: A Quick Decision Guide
- Slight looseness, seeking a non-damaging, reversible fix? -> Start with BJD Joint Friction Pads.
- No specialized materials on hand, need a temporary or gentle solution? -> Explore Strategic Padding with Common Materials.
- Severe looseness, and you’re an experienced collector who understands permanent consequences? -> Consider Joint Sealants.
- Overall body floppiness, not just one joint? -> First, check your doll’s elastic stringing.
Method 1: The Reversible Magic of BJD Joint Friction Pads
This is often my first recommendation for mild to moderate looseness because it’s non-damaging and completely reversible. BJD joint friction pads work by increasing the static friction between the joint ball and its socket, allowing the doll to hold a pose more effectively.
Steps:
- Identify the loose joint. Gently remove the limb or part if necessary to access the joint socket.
- Clean the joint area. Ensure there’s no dust or debris that could interfere with adhesion or cause further abrasion.
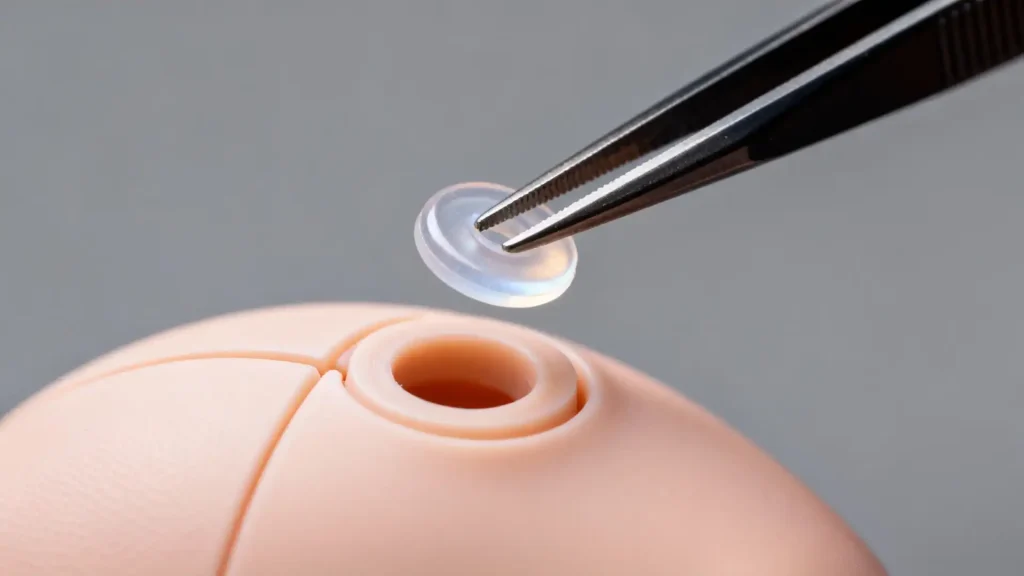
- Choose your pad material. Silicone pads are excellent for their grip and durability. Velvet or suede fabric can also work, offering a softer touch. I’ve found thin silicone pads to be particularly effective for knees and elbows.
- Cut the pad to size. You’ll want small, thin pieces that fit snugly inside the joint socket without protruding or interfering with movement. For ball joints, small crescent shapes or tiny dots often work best.
- Apply the pad. Use a tiny dab of clear-drying, non-acidic glue (like PVA glue or a specialized BJD adhesive) to secure the pad inside the socket. Do not use super glue, as it can damage resin and is irreversible.
- Reassemble and test. Allow the glue to dry completely before reassembling the limb. Test the joint’s tension. You might need to experiment with pad placement or thickness to achieve the desired stability.
Important Considerations:
- Start small. It’s easier to add more padding than to remove it.
- Avoid over-padding. Too much padding can restrict movement or put undue stress on the resin, potentially leading to cracks.
- Silicone pads increase friction by creating a slightly tacky surface, while fabric pads work by increasing the contact area and providing a softer, grippier surface.
Method 2: Strategic Padding with Common Materials (Fabric, Latex, etc.)
Beyond specialized pads, everyday materials can be surprisingly effective for how to fix loose BJD joints. This method is similar to using friction pads but often involves materials you might already have.
Materials and Techniques:
- Fabric: Small pieces of thin felt, moleskin, or even medical tape (the fabric kind) can be cut and applied inside the joint socket. These are good for adding a bit of bulk and friction. I’ve personally used small squares of moleskin for shoulder joints that needed just a touch more grip.
- Latex/Rubber: Thin strips of latex (from gloves or balloons) or rubber bands can be wrapped around the joint ball itself before inserting it into the socket. This creates a grippy layer that increases friction. Be cautious with latex, as some people have allergies, and it can degrade over time, potentially leaving residue.
- Hot Glue (with extreme caution): A very thin layer of hot glue can be applied to the inside of a joint socket, allowed to cool, and then trimmed. This creates a slightly textured, grippy surface. This is a more advanced technique and carries risks. If applied too thickly, it can permanently alter the joint fit. Always test on an inconspicuous area first.
Potential Risks:
- Residue: Some materials, especially adhesives or degrading latex, can leave sticky or discolored residue on your doll’s resin.
- Uneven wear: Improperly placed padding can cause uneven friction, leading to accelerated wear in other areas of the joint.
- Irreversibility: While most padding can be removed, some glues or materials might be difficult to clean completely.
My personal experience suggests that fabric padding is excellent for adding subtle friction, while thin latex can provide a more significant grip. Always consider the material’s longevity and potential for residue.
Method 3: When and How to Use Joint Sealants (The More Permanent Solution)
I only recommend this method if you’re an experienced collector. It should be considered a last resort for severely loose joints that haven’t responded to other methods. Joint sealants are generally irreversible and carry a high risk of permanently altering your doll’s resin.
What are they? Joint sealants are typically liquid compounds that, when applied, create a thin, slightly textured, and grippy layer on the resin surface. They are designed to increase friction. Products like Mr. Super Clear (a matte sealant) or specialized BJD joint sealants are sometimes used.
Steps (Proceed with Extreme Caution):
- Preparation is paramount. Disassemble the joint completely. Clean both the ball and socket thoroughly.
- Work in a well-ventilated area. Always wear a respirator mask and gloves when working with sealants, as their fumes can be toxic.
- Apply a very thin, even coat. Using a fine brush, apply a minimal amount of sealant to the inside of the joint socket or the joint ball. Less is more. You are aiming for a microscopic texture, not a thick layer.
- Allow to cure completely. Follow the product’s instructions for drying time. This can take several hours to a full day.
- Test and reapply if necessary. Reassemble the joint and test its tension. If it’s still too loose, you can apply another extremely thin coat. Do not rush this process.
Strong Warnings:
- IRREVERSIBLE: Once applied and cured, removing sealant without damaging the resin is extremely difficult, if not impossible.
- RISK OF DAMAGE: Over-application can make the joint too tight, leading to stress cracks or even breaking the resin when attempting to pose. It can also create an unsightly, rough texture.
- AESTHETICS: Sealants can alter the finish of the resin, making it matte or slightly cloudy.
- NOT FOR NOVICES: If you are unsure, do not attempt this method. Seek advice from a professional BJD repair service.
Each of these methods works by increasing the coefficient of static friction between the joint components. Friction pads and common materials physically add a layer that grips better, while sealants create a micro-textured surface. The choice depends on the severity of the looseness, your comfort level, and the desired permanence.
4. Beyond Tightening: BJD Joint Repair Tips for Common Issues
Sometimes, the problem isn’t just looseness but other common joint ailments. Knowing how to fix loose BJD joints is one thing, but addressing squeaks, cracks, or stringing issues requires a different approach.
Squeaky Joints vs. Stiff Joints: Diagnosis and Remedies
- Squeaky Joints: A squeak usually indicates dry friction between resin parts.
- Remedy: Disassemble the joint and clean both the ball and socket thoroughly. Then, apply a tiny amount of dry lubricant (like silicone spray or a graphite pencil lead rubbed onto the joint surfaces). Avoid oil-based lubricants, as they can attract dust and potentially stain resin over time. Reassemble and test.
- Stiff Joints: Stiff joints can be caused by too much friction, improper stringing tension, or sometimes, a slight manufacturing imperfection.
- Remedy: First, check the stringing. If it’s too tight, it can cause stiffness. If the stringing is fine, you might need to lightly sand the joint ball or the inside of the socket. Use very fine-grit sandpaper (e.g., 1000-2000 grit) and sand in small, controlled motions. Proceed with extreme caution, as over-sanding is irreversible. The goal is to remove microscopic burrs, not to reshape the joint.
Dealing with Minor Cracks or Stress Marks Near Joints
Minor cracks or stress marks, especially near stringing holes or joint edges, can be alarming.
- Assessment: First, assess the severity. Is it a surface crack or does it go deeper? Is it actively spreading? If it’s a hairline crack that isn’t spreading and doesn’t compromise structural integrity, you might be able to manage it.
- Simple Repair (for minor surface cracks): For very small, non-structural cracks, some collectors use UV resin or clear UV glue. Apply a tiny amount to the crack, cure it with a UV light, and then carefully sand and polish the area to blend it. This is a cosmetic fix and not a structural repair.
- When to Seek Professional Help: If the crack is deep, spreading, or located in a critical weight-bearing area, it’s time to consult a professional BJD repair service. Attempting a major structural repair yourself can lead to further damage.
When to Consider a Full Part Replacement: How to Buy BJD Joint Parts
Sometimes, a joint is simply too worn or damaged to be effectively repaired. In such cases, replacing the part is the best option.
- Reliable Channels:
- Manufacturer’s Official Website: This is always the safest bet for obtaining genuine replacement parts that will match your doll’s resin and fit perfectly.
- Authorized Dealers/Reputable BJD Shops: Many online BJD stores carry replacement parts or can order them for you.
- Second-hand Market (with caution): You might find parts on BJD sales forums or groups, but always verify the seller’s reputation and ask for clear photos to ensure the part matches your doll’s resin color and sculpt. Resin can yellow differently over time, so a perfect match might be challenging.
BJD Stringing & Elastic Replacement: The Core of Joint Tension
The elastic cord running through your BJD is the unsung hero of its posing ability. It provides the tension that holds the joints together.
- How to Judge Elastic Aging:
- Loss of Tension: The most obvious sign is a doll that feels “floppy” or struggles to stand, even after joint padding.
- Visible Fraying/Discoloration: If you can see the elastic through the neck or limb openings, check for fraying, thinning, or yellowing/darkening of the cord.
- Brittleness: Old elastic can become brittle and snap easily.
- Choosing the Right Elastic:
- Material: High-quality elastic cord, often made of strong synthetic fibers, is recommended. Avoid cheap, craft-store elastic that degrades quickly.
- Thickness: The thickness of the elastic needs to match your doll’s size and stringing channels. Too thin, and it won’t provide enough tension; too thick, and it won’t fit or will put undue stress on the resin. Consult your doll’s manufacturer specifications or BJD community guides for recommended sizes.
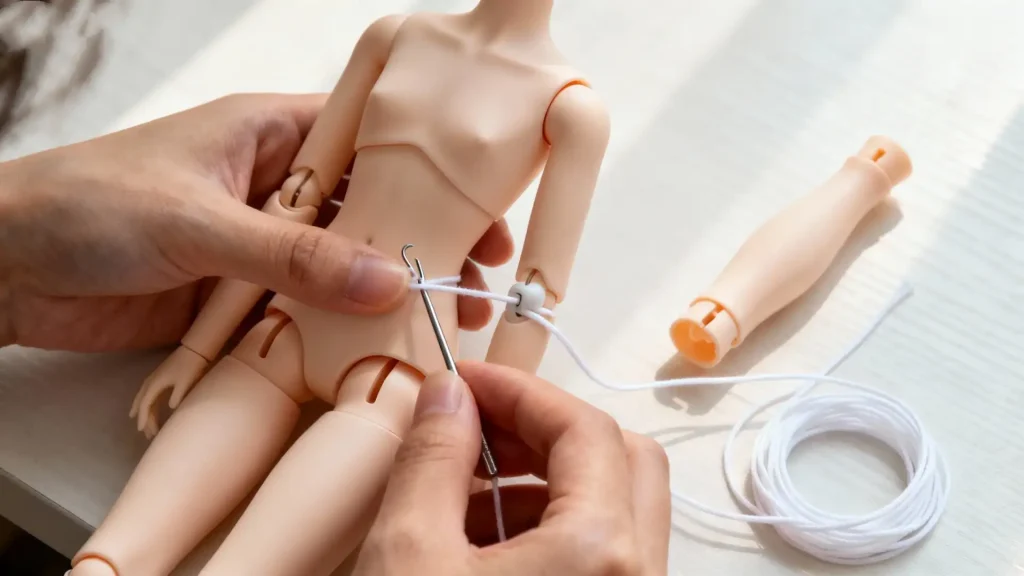
- How to Replace BJD Elastic: A Step-by-Step Guide
- Gather Tools: Prepare new elastic, a stringing hook (or a bent wire), scissors, and a pair of clamps or hemostats.
- Disassemble Doll: Carefully remove all limbs and the head. Keep track of which limb goes where.
- Remove Old Elastic: Cut the old elastic and pull it out.
- Measure & Cut New Elastic: A good rule of thumb is to cut the new elastic about 1.5 to 2 times the height of your doll, but this can vary. You want enough length to comfortably string the doll with good tension.
- Thread the Torso: This is the trickiest part.
- For a single-piece body: Thread the elastic through the head, down through the torso, and out through one leg. Secure one end of the elastic with a clamp. Thread the other end back up through the other leg, through the torso, and out through one arm. Secure this end. Then, thread the remaining elastic through the other arm. (A diagram showing the common “X” pattern stringing route through a torso would be helpful here.)
- For multi-part stringing: Some dolls have separate elastic for arms and legs. Follow the manufacturer’s specific stringing guide.
- Attach Limbs and Knot: Pull the elastic ends taut and thread them through the corresponding limb hooks. Use your stringing hook to pull the elastic through the small holes in the hands/feet.
- Tie Off Elastic: Once all limbs are attached, pull the elastic taut (but not so tight that it stresses the resin) and tie a secure knot. A surgeon’s knot or a double overhand knot works well. Trim excess elastic.
- Test Tension: Reassemble the doll and test its posing ability. You might need to adjust the knot or re-string if the tension isn’t right.
This process can be daunting the first time, but with practice, it becomes much easier. There are many excellent video tutorials available online that can visually guide you through the BJD stringing guide process for various doll types.
5. Assembling Your BJD Joint Repair Kit: Be Prepared for Anything
Having a dedicated BJD joint repair kit is like having a first-aid kit for your doll. It ensures you’re ready to tackle minor issues before they become major problems.
Here’s what I recommend for your kit:
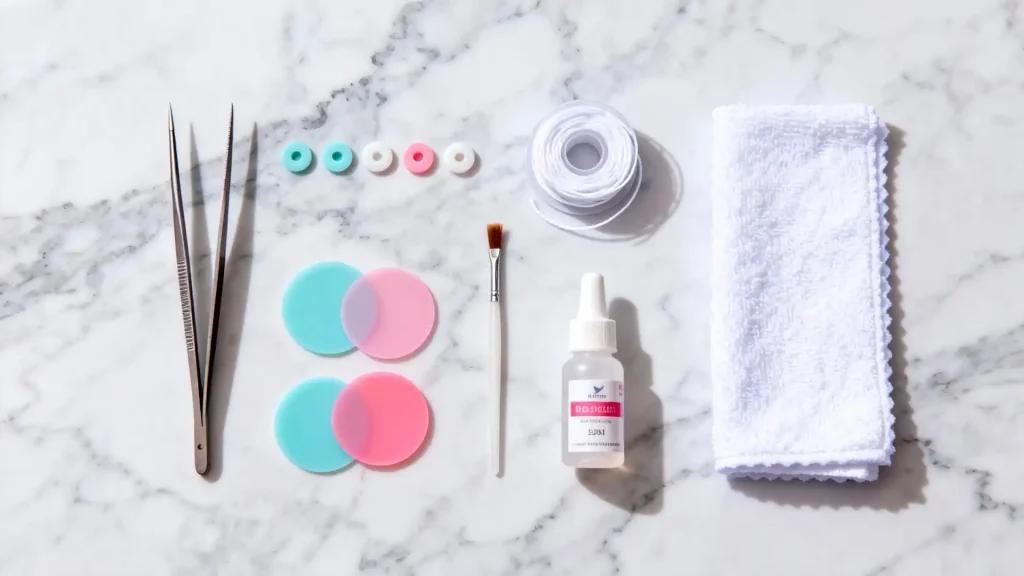
- Essential Tools:
- Tweezers: Fine-tipped tweezers are invaluable for handling small friction pads, removing debris, and manipulating elastic.
- Silicone Mat/Work Surface: Protects your doll and your workspace from scratches and spills.
- Clear-Drying, Non-Acidic Glue: For attaching friction pads (e.g., PVA glue, E6000, or specialized BJD adhesive). Absolutely NO super glue.
- Fine-Grit Sandpaper/Sanding Sponges: (e.g., 1000-2000 grit) for very light sanding of stiff joints.
- Dry Lubricant: Silicone spray or a graphite pencil for squeaky joints.
- Scissors/Hobby Knife: For cutting friction pads and elastic.
- Stringing Hook/Bent Wire: Essential for BJD elastic replacement.
- Microfiber Cloths: For cleaning resin surfaces.
- Cotton Swabs/Q-tips: For precise cleaning and glue application.
- BJD Joint Friction Pads: A variety of sizes and materials (silicone, felt).
- Optional Advanced Tools (for experienced users):
- UV Light & UV Resin/Glue: For minor crack repair.
- Respirator Mask & Gloves: Crucial for safety if working with sealants or strong chemicals.
- Small Clamps/Hemostats: Useful for holding elastic during stringing.
For a curated selection of professional-grade tools and materials, you can explore our review of recommended BJD stringing kits. Please note: I am recommending these tools based purely on my 15 years of personal experience and what I’ve found effective within the BJD community. There is no commercial sponsorship involved in these recommendations.
6. FAQ: Your BJD Joint Questions, Answered by a Long-Time Collector
Over the years, I’ve heard every question imaginable about BJD joints. Here are some of the most common ones, answered with the wisdom of experience.
Q: My doll’s leg keeps falling off. Is it ruined?
A: Not ruined! This is a fixable issue. While alarming, a leg falling off usually indicates severely loose stringing or a very worn joint. It’s rarely “ruined.” This is a prime candidate for BJD elastic replacement or applying BJD joint friction pads. Don’t panic; it’s a fixable issue.
Q: Can I use household super glue to tighten a joint?
A: No. Super glue damages resin and creates a brittle, uneven fix. NO, absolutely NOT! This is one of the most common and damaging mistakes I see. Super glue (cyanoacrylate) is brittle, can permanently bond to and damage resin, and is nearly impossible to remove without causing further harm. It will create a rough, uneven surface that will accelerate wear and can even cause stress cracks. Always use non-acidic, clear-drying glues specifically designed for crafts or BJD use if you need an adhesive.
Q: How often should I really be adjusting my doll’s pose?
A: Avoid extreme poses for long periods; regular changes are best. There’s no hard and fast rule, but I generally recommend not leaving your doll in extreme or gravity-defying poses for more than a few days to a week. For more relaxed poses, you can leave them longer. Regularly changing poses helps distribute wear and prevents prolonged stress on specific joints. Think of it as stretching for your doll!
Q: Are tighter joints always better? What are the downsides?
A: Overly tight joints cause stress cracks and accelerated wear. While good tension is desirable, overly tight joints are not always better. Excessive tightness can put immense stress on the resin, leading to stress cracks, especially around stringing holes or joint edges. It can also make posing difficult and unnatural, and accelerate wear due to increased friction. The goal is “just right” tension – enough to hold a pose, but still allowing smooth movement.
Q: My doll’s resin is yellowing near the joints. Is this normal?
A: Yellowing indicates resin aging and UV exposure; check environment. Yellowing, especially on lighter skin tones, is a common sign of resin aging and UV exposure. While it’s a natural process for resin, yellowing near joints can sometimes indicate that the resin in that area is degrading faster due to stress or environmental factors. It’s a good reminder to check your doll’s environment and ensure proper BJD resin care. It doesn’t necessarily mean the joint is failing, but it’s a visual cue to be more vigilant.
Q: What’s the best way to store my BJD to prevent joint issues?
A: Disassemble for long-term storage; use a stand for short-term display. For long-term storage, disassemble your doll and store the parts individually in acid-free bags or tissue paper, ideally in a dark, temperature- and humidity-controlled environment. This relieves tension on the elastic and prevents prolonged stress on the joints. For shorter periods, a doll stand in a display cabinet away from direct light is ideal.
Q: Does frequently re-stringing my doll weaken the resin holes?
A: No, not if done gently with proper tools; rough handling causes damage. Re-stringing itself, when done carefully and with appropriate tools, does not inherently weaken the resin holes. The damage comes from rough handling, forcing elastic through too-small holes, or using sharp tools carelessly. Regular, gentle re-stringing is a necessary part of BJD doll maintenance and helps preserve your doll’s posing ability.
Q: Are off-brand/3D printed joint parts worth buying?
A: Exercise caution; prioritize reputable sources for fit and durability. Off-brand or 3D printed joint parts can be a tempting alternative, especially for older or rare dolls. However, exercise extreme caution. They often come with risks: potential dimensional inaccuracies leading to poor fit, differences in resin strength or durability compared to original parts, and color matching issues. I recommend them only as a last resort, and always prioritize sellers with strong community reputations and clear return policies.
Conclusion: The Art of BJD Joint Maintenance
Caring for your BJD’s joints is more than just a chore; it’s an act of love and responsibility. It’s about understanding the intricate mechanics of your doll, anticipating potential issues, and applying thoughtful, gentle interventions. From the simple act of applying BJD joint friction pads to the more involved process of BJD elastic replacement, each step you take contributes to your doll’s longevity and your enjoyment of their beauty.
As collectors, we form deep emotional bonds with our dolls. This guide, born from years of hands-on experience, aims to empower you with the knowledge and confidence to ensure your precious BJD remains a perfect poser for years to come. Embrace the journey of BJD joint maintenance not as a burden, but as an integral part of your shared story, a testament to your dedication, and a way to truly connect with your doll. Personalizing your BJD, from its pose to its face, is all part of the collector’s journey.. May your dolls always stand tall and pose perfectly!
BJD Customization & Maintenance Series
- Your 2025 BJD Faceup Tutorial: A Pro’s Guide to Soulful Art
- How to String a BJD: A Veteran’s No-Nonsense Guide
- Pristine Resin: How to Clean a BJD Doll The Right Way
- BJD Customization: The Ultimate Guide to Personalizing Your Doll
- BJD Body Blushing: The Alchemist’s Guide to Skin That Breathes
- Make BJD Doll Eyes: An Alchemist’s Guide to Painting Soulful Gaze
- BJD Wig Styling Mastery: The Ultimate Care, Cutting & Customization Guide
- The Ultimate BJD Clothing Guide: Design, Patterns & Fit
- Ultimate BJD Storage Guide: Beat Yellowing with Pro Display Ideas
- BJD Faceup Pricing Guide: Unpacking Custom Eye Chips & Lip Blushing Costs
- Bringing Them Back to Life: Your Guide to BJD Restoration Service for Broken Fingers & Yellowed Resin
- BJD Stringing Kits: DIY Tightening for Stable, Pro Posing
- BJD Customization Services: Faceup & Full Body Blushing Guide
- BJD Body Modification: Sculpting Your Doll‘s Unique Form (2025 Guide)
- Mastering BJD Seam Sanding: A Pro’s Guide to Flawless Resin Finishes
- BJD Joint Maintenance: Keeping Your Doll Posing Perfectly for Years (You are here)
- BJD Eye Well Modification: Achieving Deeper, More Expressive Gaze
- Mastering Advanced BJD Faceups: Beyond Basics to Lifelike Artistry
- BJD Resin Whitening & Anti-Yellowing: A Collector’s Proven Guide to Preserve Beauty
- BJD Stringing Tension Guide: Optimizing Posing & Stability
- BJD Magnet Installation: The Ultimate Safety Guide to Unlocking Dynamic Posing