As someone who has dedicated the last 15 years to the intricate world of BJD collecting, faceup artistry, and teaching, I’ve witnessed firsthand the incredible evolution of our craft. My mission, and the very essence of this guide, is to empower fellow artists like you to transcend conventional techniques, pushing your BJD faceups into the realm of true art. This isn’t just another tutorial; it’s a master map, drawn from years of experience, designed to guide you through the nuanced philosophies and practical applications that breathe unique life and soul into every doll. This philosophy of deep customization is at the heart of personalizing your doll, which we explore comprehensively in our ultimate guide. We, as a community, are constantly learning and growing, and I’m thrilled to share these insights with you.
Part 1: The Foundation – What Truly Makes a Faceup “Advanced”?
An advanced BJD faceup is not merely a technical exercise; it’s an act of creation, a fusion of color, texture, and narrative that imbues a doll with a unique sense of life and soul. This guide will lead you beyond the fundamentals, focusing on three core techniques: creating “breathing” blush, crafting natural skin stories with freckles, and integrating character-defining tattoos.
Beyond the Basics: It’s About Illusion and Depth
Many artists wonder what truly separates a basic faceup from an advanced one. It’s not about more tools or brighter colors; it’s about the pursuit of illusion and depth. While basic faceups focus on even skin tones and defined features, advanced artistry delves into simulating subcutaneous blood flow, subtle skin imperfections, and complex light transitions. The key lies in Layered Rendering and Micro-Texturing. These concepts allow us to build optical depth, making the surface appear translucent and alive, rather than flat.
In my early commissions, I often believed that bolder lines and heavier applications equated to a better, more impactful faceup. I was so proud of those strong, defined features. Then, a respected artist in our community gently pointed out that the doll looked “startled,” not alive. That was a humbling but pivotal moment. It took me years to truly realize that the most realistic and captivating effects often come from layers you don’t immediately see – a subtle optical illusion built up through meticulous application. This realization completely transformed my approach, and I hope it will yours too.
Your Essential Mindset and Toolkit Preview
Before we dive into the techniques, let’s prepare our minds and our workspace. You might find that some of these principles resonate deeply with your own artistic journey.
Mindset Preparation:
- Patience is paramount: Advanced techniques require time and a willingness to refine. Don’t worry if it doesn’t look perfect on the first try.
- Reference, reference, reference: Study real faces, skin textures, and light interactions. Many of us in the community keep mood boards of inspiration.
- Embrace reversibility: Understand that mistakes are part of the learning process; most mediums allow for correction. It’s okay to start over.
- Enjoy the journey: The process of creation should be as rewarding as the final result.
Toolkit Preview:
For these advanced techniques, your choice of materials significantly impacts the outcome. You’ll need:
- High-quality artist pastels/pigments: Brands like Schmincke, Rembrandt, or Sennelier offer finely milled pigments crucial for smooth blending and layering. Their specific characteristics, such as lightfastness and particle size, are vital.
- Specialized brushes: Fine-tipped brushes (000 or smaller), soft blending brushes, and even stippling brushes will be essential.
- Thinners/Diluents: Isopropyl alcohol (90%+) or specialized acrylic thinners for precise application of liquid mediums.
- Sealants/Fixatives: A good quality matte sealant like MSC (Mr. Super Clear) or Volks Zoukeimura is non-negotiable. Understanding their properties – such as drying time, finish, and adhesion to resin – is critical.
- Practice heads: Always experiment on a spare head or resin blank first. This is where you can truly let loose and learn without fear.
When building your BJD faceup supplies kit, consider investing in quality over quantity. A few excellent tools will serve you better than many mediocre ones.
Part 2: Mastering the Techniques of Lifelike Illusion
BJD Blushing Techniques: Where Life Resides
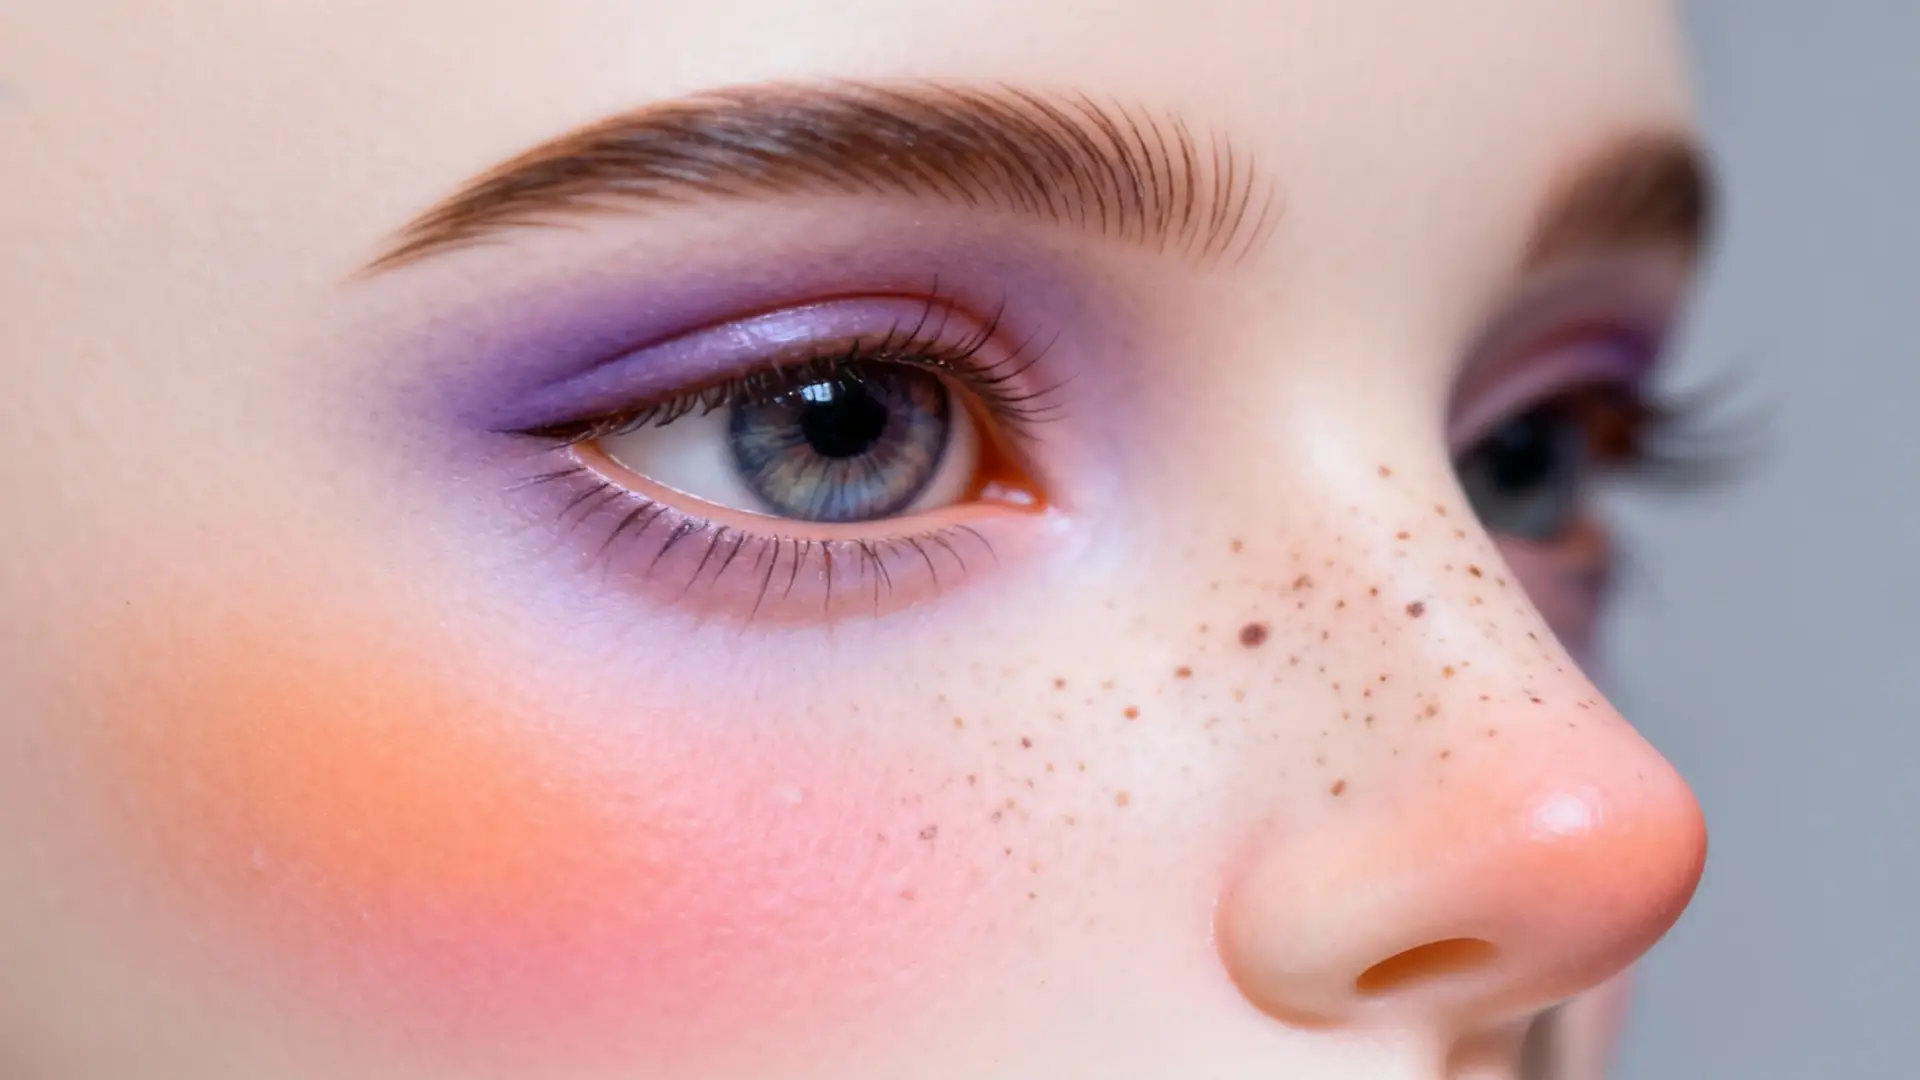
The goal of advanced blushing isn’t just to add color; it’s to simulate the subtle flush of life beneath the skin. We’re aiming for the appearance of blood circulating, reacting to temperature, and defining contours.
Color Theory in Blushing:
Why can’t we just use one shade of red? Because real skin isn’t monochromatic.
- Warm Reds/Oranges: Mimic surface blood flow, often seen on cheeks, nose, and chin.
- Cool Violets/Blues: Suggest deeper veins or areas with less oxygenated blood, like the earlobes or under-eye areas.
- Subtle Yellows/Greens: Can be used in extremely thin layers to neutralize overly red areas or add a hint of sallow undertone for specific character types.
Expertise Insight: We use cool-toned reds or even a touch of purple on the earlobes because it simulates the effect of lower oxygen saturation in the capillaries there, adding incredible realism. Similarly, multiple thin layers of blush build optical depth, allowing light to interact with each layer, creating a translucent, living effect.
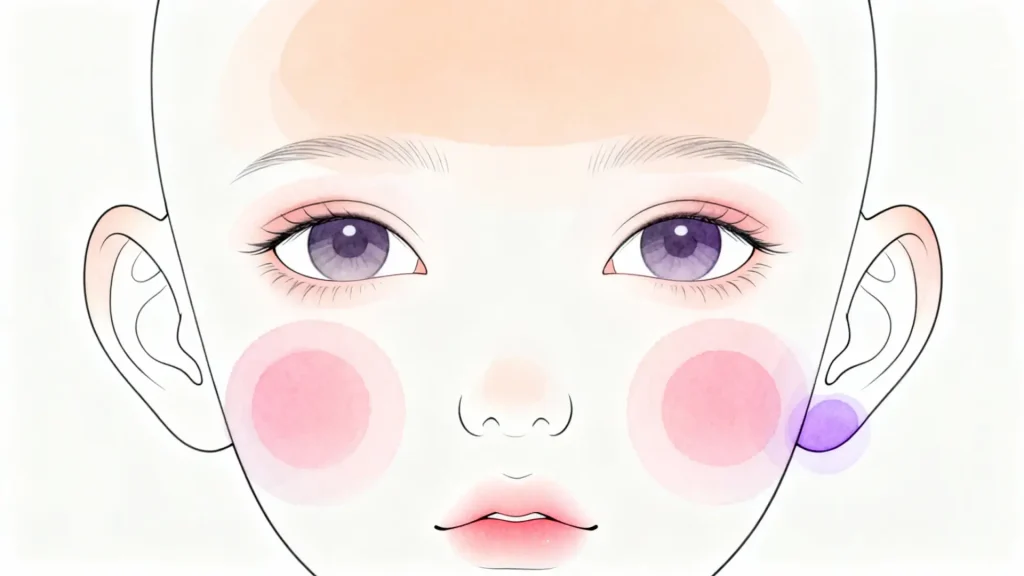
Layered Application Steps:
- Diffuse Base Layer: Begin with a very light, broad application of a warm, neutral blush color across the general cheek and forehead areas. This establishes a foundational warmth.
- Focus Reinforcement: Concentrate slightly deeper shades on areas where blood naturally pools or where skin is thinner: the apples of the cheeks, the tip of the nose, the chin, and the earlobes.
- Edge Blending & Correction: Always blend from the center outwards. Use a clean, soft brush to feather the edges, ensuring there are no harsh lines. If a spot is too intense, a tiny amount of thinner on a cotton swab can gently lift pigment.
Advanced Blushing FAQ & Quick Fixes
Here are some common challenges we all face with blushing, and how to overcome them:
- Q: My blush looks like a harsh, dirty smudge. What went wrong?
- A: This is classic “over-application.” The fix: gently lift pigment with a clean, dry brush or a swab dipped in thinner. Next time, remember: build color in whisper-thin layers. The first layer should barely be visible.
- Q: The color looks flat and painted on, not like skin.
- A: You’re likely using a single hue. Remember skin is multi-tonal. Layer a cool violet very subtly over your warm red base in areas like the earlobes to create optical depth. This optical illusion is key!
- Q: My blush disappears after sealing!
- A: This can happen if your sealant is applied too heavily or if the pastel isn’t properly adhered. Try applying thinner, more even coats of sealant, and ensure your pastel layers are built up gradually and pressed gently into the surface.
BJD Freckles Tutorial: Crafting a Skin Story
Freckles are not just random dots; they are a narrative of sun exposure, genetics, and character. The goal is natural, organic randomness, not a uniform pattern. This is a key detail for a realistic BJD faceup.
Naturalistic Observation:
Observe real freckles:
- Distribution: They tend to cluster around the nose, cheeks, and forehead, often fading towards the hairline or jawline.
- Size & Shape: They vary in size and are rarely perfectly round. They can be irregular, elongated, or even merge slightly.
- Color & Depth: Freckles vary in color from light tan to dark brown, and some appear deeper than others.
Tools & Techniques Comparison:
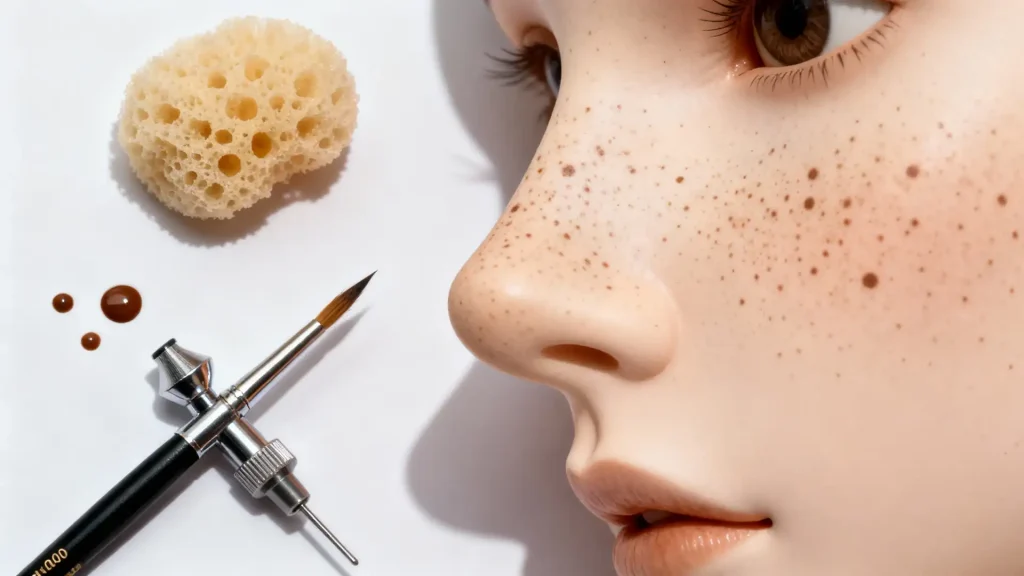
- Fine-tipped Brush + Diluent: My preferred method for ultimate control. Use a 000 brush with a tiny amount of thinned pastel or acrylic paint. This allows for varied sizes and shapes.
- Sponge Stippling: A small piece of natural sponge, lightly dabbed in thinned pigment, can create a very diffuse, random pattern. Best for a subtle, widespread effect.
- Airbrush (Low Pressure): For the most subtle, almost imperceptible freckles, an airbrush with extremely low pressure and highly diluted pigment can create a fine mist. This requires practice to avoid overspray.
How-to: Create Natural, Story-Telling Freckles
- Map Your Sun-Kissed Zones: Imagine sunlight kissing the face – the areas most exposed, and often most freckled, are your starting points. This means the charming triangle around the inner corners of the eyes and along the bridge of the nose.
- Establish Your Core Cluster: Begin by placing a few darker, more prominent freckles within these core zones. Use your fine-tipped brush and thinned pigment.
- Expand with Variation: Gradually extend the freckles outwards onto the cheeks and forehead. As you move away from the central facial area, make them sparser and lighter.
- Vary Size and Intensity: Pro Tip: Do not make all freckles the same size or color! Use different brush pressures or pigment dilutions to create a natural variation. Some can be barely visible, others more pronounced. This is crucial for realism.
- Integrate with a Soft Touch: After applying, a very soft, clean brush can be used to gently tap over some freckles, slightly blurring their edges to make them appear more integrated into the skin, as if they’ve always been there.
I remember one time, struggling to make freckles look truly organic. I was looking at a friend’s face, noticing how her freckles weren’t just dots, but almost like tiny, faded smudges in some areas, and sharper in others. That observation was my “aha!” moment, leading me to experiment with gentle tapping and blurring, which completely transformed my freckle technique.
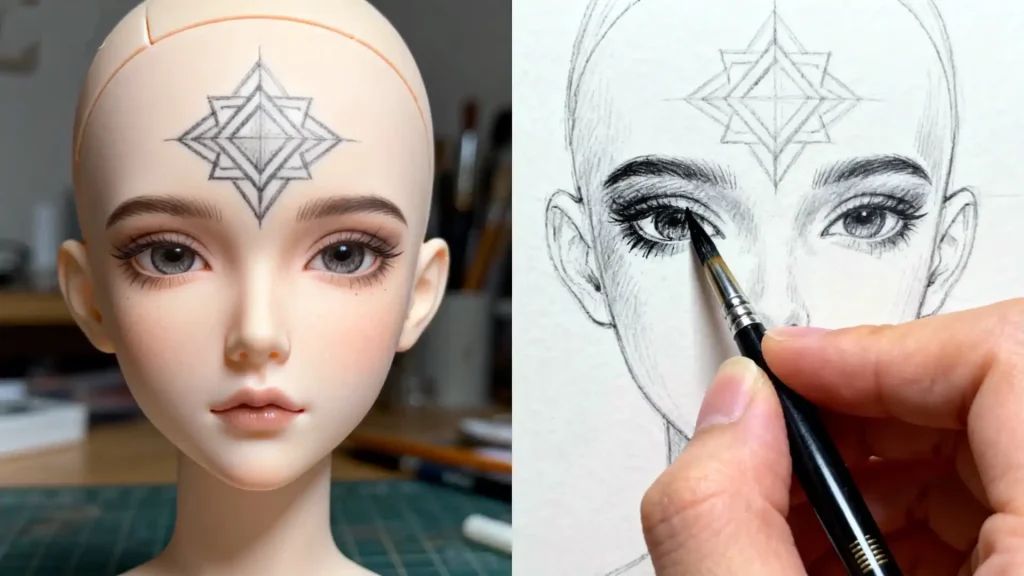
BJD Tattoo Application: From Design to Permanent Art
Adding tattoos to a BJD faceup is a powerful way to tell a character’s story, but it requires precision and a delicate touch to ensure it looks like it’s part of the skin, not just sitting on top.
Design Transfer & Positioning:
- Water Decal Paper: For intricate designs, printing your tattoo onto clear water decal paper is excellent. Practice placement on a scrap piece first.
- Positioning Pens/Pencils: Use a water-soluble pen or a light pencil to sketch out the placement and size directly on the sealed resin. This allows for “pre-visualization” and ensures symmetry.
- Temporary Tattoo Paper: Similar to decals, these can be used for larger, more complex designs, offering a good preview before committing to paint.
Expertise Insight: I once had a commission for a highly detailed, symmetrical tribal tattoo on a doll’s forehead. I spent hours meticulously freehanding that design, only to step back and see it was glaringly asymmetrical. The heart-sinking feeling taught me more than any success ever had. I learned the hard way that for precision, pre-planning and transfer methods are non-negotiable. Now, I always use a light pencil sketch or a decal to ensure perfect symmetry and placement.
Outlining & Filling Techniques:
- Fine Lines: Use a 000 or 0000 brush with highly diluted acrylic paint or thinned pastel. Apply in multiple thin layers rather than one thick stroke. This prevents pooling and allows for crisp lines.
- Color Blocks: For solid areas, build up color with several thin, even layers. Allow each layer to dry completely before applying the next. Never try to achieve full opacity in one go.
- Dilution is Key: The consistency of your paint should be like ink – thin enough to flow smoothly but not so watery that it bleeds.
Protection & Integration:
After the tattoo is complete and fully dry, the final step is crucial for making it look “embedded.”
- Transparent Pastel Dusting: Lightly dust a very fine layer of transparent or skin-toned pastel over the tattoo. This subtly mutes the tattoo’s sharpness, making it appear as if it’s under the skin.
- Thin Sealant Layers: Apply several very thin layers of matte sealant over the entire face, including the tattoo. This protects the artwork and further integrates it into the faceup. Over-applying sealant can lead to an uneven, glossy finish or even affect the resin’s longevity.
For exceptionally complex designs or if you’re aiming for museum-quality results, seeking BJD faceup artist services for tattoo application can be a wise investment. It acknowledges the specialized skill involved.
Bringing It All Together & Next Steps

The Art of Detailing: Integration and Harmony
The true mark of an advanced faceup is how all the individual elements – blush, freckles, and tattoos – work in concert to tell a cohesive story. This is where BJD faceup detailing shines.
- Blush and Freckles: Consider how freckles might appear slightly more concentrated or darker within a blushed area, adding another layer of texture.
- Tattoos and Skin Tone: A subtle, almost imperceptible hint of redness or irritation around a freshly “applied” tattoo can add incredible realism. This can be achieved with a whisper of warm pastel.
- Overall Narrative: Does the placement of a tattoo make sense with the character’s backstory? Do the freckles suggest a life spent outdoors? Every detail should contribute to the doll’s unique identity.
Preservation, Practice, and Finding Your Voice
Your masterpiece deserves to be preserved. Proper preservation with sealant is key. Equally important is knowing how to safely clean your BJD doll’s resin to maintain its beauty long-term
- Final Sealing: After all layers are dry, apply 2-3 even, thin coats of your chosen matte sealant. Ensure good ventilation and proper distance. Different sealants have varying levels of UV protection and durability.
- Handling: Always handle your doll by the headcap or body, avoiding direct contact with the faceup.
The Philosophy of Practice:
- Experiment on Practice Heads: This cannot be stressed enough. It allows you to take risks, try new techniques, and learn from mistakes without fear.
- Document Your Process: Take photos at different stages, note down the colors and techniques used. This creates a valuable reference library for future projects.
- Analyze and Adapt: What worked? What didn’t? How can you improve next time? Every “failure” is a stepping stone to mastery.
Your Advanced Faceup Journey: Next Questions Answered
- How do I photograph my advanced faceup to show all its detail?
- Use natural, diffused light. Avoid harsh direct flashes. Focus on macro shots to capture the micro-textures and subtle layering. A plain, neutral background helps the faceup stand out.
- What if I want to change my doll’s faceup later?
- Most modern sealants and pigments are removable with appropriate solvents (like Mr. Color Thinner or acetone, used carefully and sparingly). Always test on an inconspicuous area first. This reversibility is a wonderful aspect of BJD artistry!
- How can I find inspiration for new faceup styles?
- Look beyond BJD! Study human portraiture, makeup artistry, even nature. Our community is also a fantastic resource; share your work and see what others are creating.
We, as a community of fellow artists, understand the profound connection we have with our dolls. Each doll is a story waiting to be told, and your faceup is its first, most intimate chapter. Don’t be afraid to write a unique one, to infuse it with your personal vision and artistic soul. That is where true artistry lies. I encourage you to share your creations, learn from each other, and continue pushing the boundaries of what’s possible.
BJD Customization & Maintenance Series
- Your 2025 BJD Faceup Tutorial: A Pro’s Guide to Soulful Art
- How to String a BJD: A Veteran’s No-Nonsense Guide
- Pristine Resin: How to Clean a BJD Doll The Right Way
- BJD Customization: The Ultimate Guide to Personalizing Your Doll
- BJD Body Blushing: The Alchemist’s Guide to Skin That Breathes
- Make BJD Doll Eyes: An Alchemist’s Guide to Painting Soulful Gaze
- BJD Wig Styling Mastery: The Ultimate Care, Cutting & Customization Guide
- The Ultimate BJD Clothing Guide: Design, Patterns & Fit
- Ultimate BJD Storage Guide: Beat Yellowing with Pro Display Ideas
- BJD Faceup Pricing Guide: Unpacking Custom Eye Chips & Lip Blushing Costs
- Bringing Them Back to Life: Your Guide to BJD Restoration Service for Broken Fingers & Yellowed Resin
- BJD Stringing Kits: DIY Tightening for Stable, Pro Posing
- BJD Customization Services: Faceup & Full Body Blushing Guide
- BJD Body Modification: Sculpting Your Doll‘s Unique Form (2025 Guide)
- Mastering BJD Seam Sanding: A Pro’s Guide to Flawless Resin Finishes
- BJD Joint Maintenance: Keeping Your Doll Posing Perfectly for Years
- BJD Eye Well Modification: Achieving Deeper, More Expressive Gaze
- Mastering Advanced BJD Faceups: Beyond Basics to Lifelike Artistry (You are here)
- BJD Resin Whitening & Anti-Yellowing: A Collector’s Proven Guide to Preserve Beauty
- BJD Stringing Tension Guide: Optimizing Posing & Stability
- BJD Magnet Installation: The Ultimate Safety Guide to Unlocking Dynamic Posing