When you first unbox your BJD, it’s more than just a doll; it’s a piece of art, a character waiting to be brought to life, a vessel for countless stories and emotions. We spend hours posing them, dressing them, customizing them, photographing them, and forming an undeniable bond. That’s why, when we discover a tiny finger snapped off or notice that tell-tale yellow tinge creeping across their beautiful resin, it feels like a punch to the gut. We all know how heartbreaking it is when our beloved dolls get hurt. But take a deep breath, my friend, because damage to your BJD is not the end of their story. It’s merely a chapter that calls for a little tender loving care, and often, the expert touch of a dedicated BJD restoration service.
I remember one particularly challenging case early in my career: a Dollfie Dream that had survived a house fire. Her owner, heartbroken and almost resigned, brought her to me. The doll was severely yellowed, almost orange in places, with melted spots and several broken fingers from the impact. It was a daunting task, but as I meticulously cleaned, reshaped, and restored her, piece by piece, I wasn’t just working with resin; I was helping to mend a piece of someone’s cherished memory. When the owner saw her doll, restored to her former glory, tears welled up in their eyes. That moment solidified for me that what we do isn’t just about fixing objects; it’s about preserving joy, rekindling hope, and honoring the deep emotional connection between a collector and their doll.
Understanding the Two Most Common BJD Ailments
Over my fifteen years in this wonderful hobby, I’ve encountered countless dolls in various states of disrepair. While the causes can be diverse, two issues stand out as the most frequent and distressing: broken fingers and yellowed resin.
The Heartbreak of Broken Fingers: Causes and Immediate Care
Ah, the dreaded broken finger. It’s a scenario I’ve seen play out hundreds of times. Why are these delicate digits so prone to snapping? It often comes down to a combination of factors:
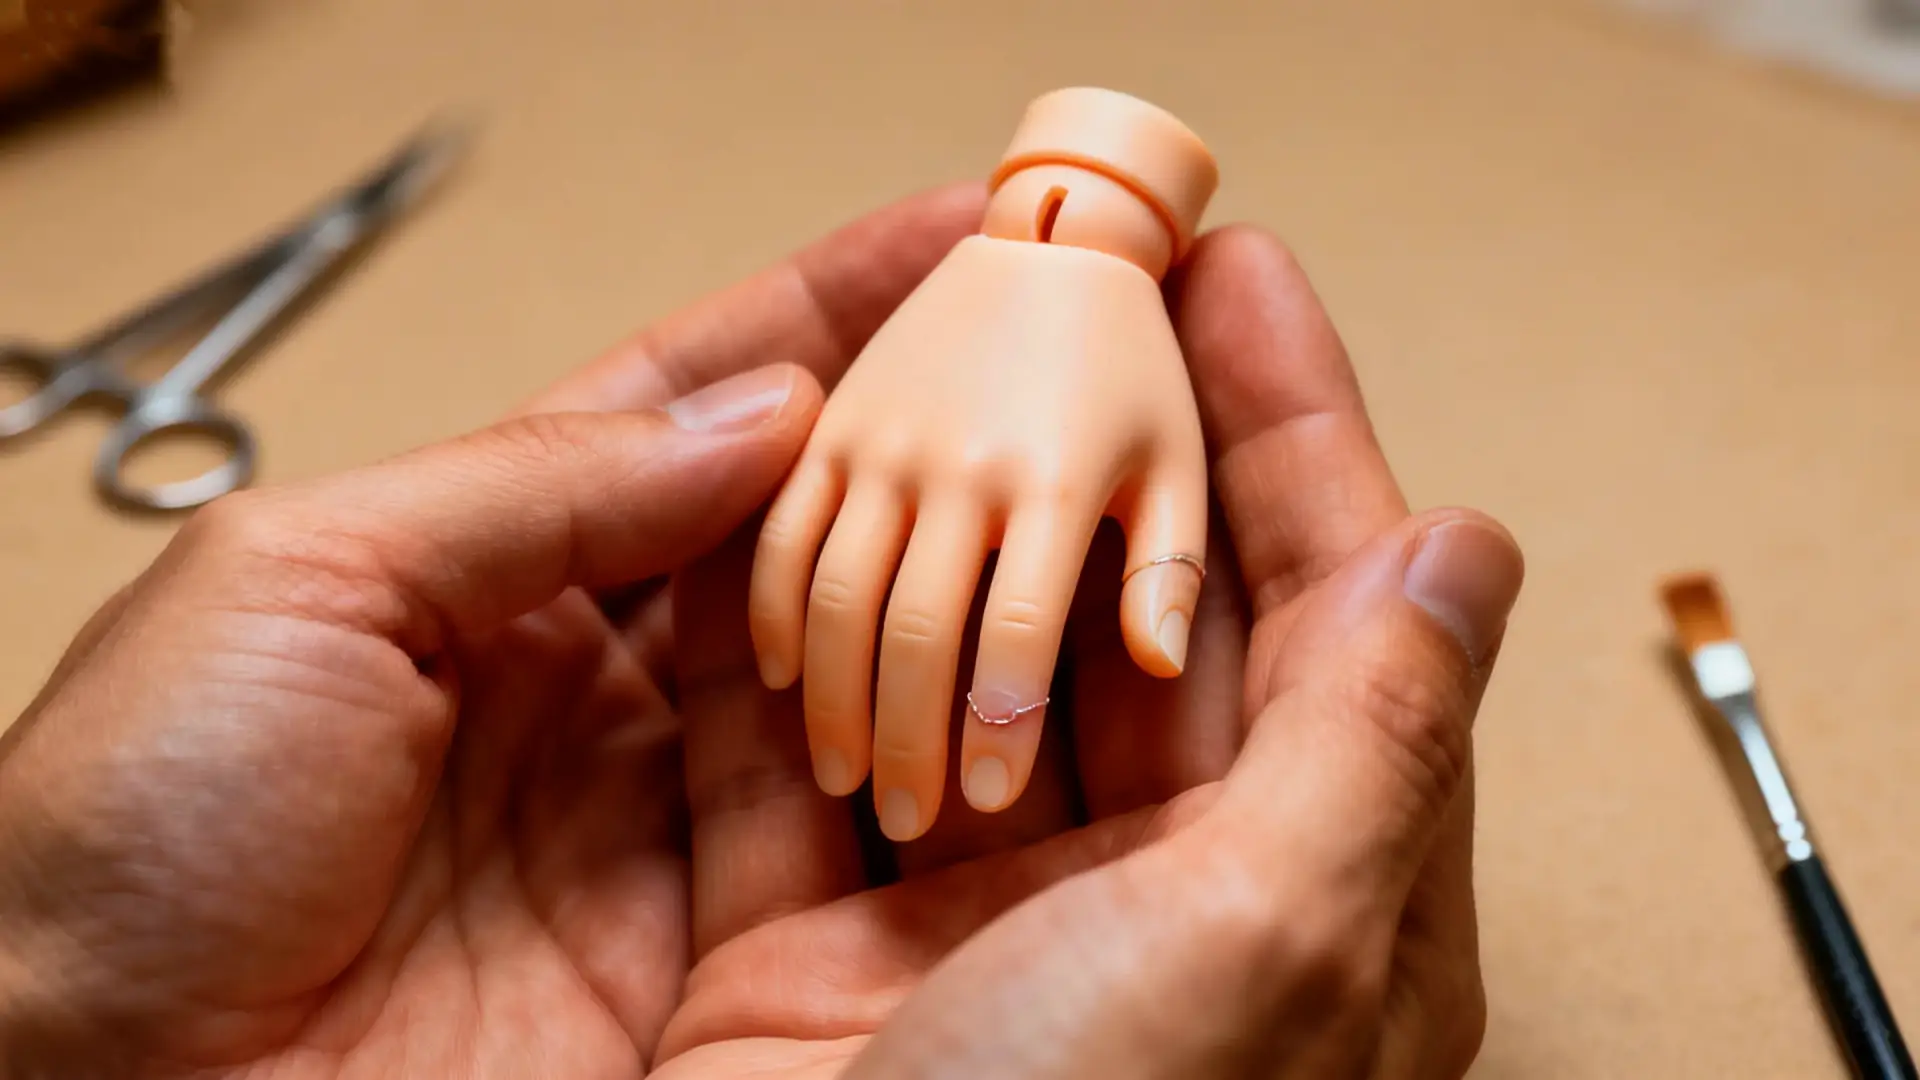
- Design: Many BJD hands are sculpted with incredible detail, featuring slender, delicate fingers that, while beautiful, can be inherently fragile.
- Stress Concentration: Fingers, especially the pinky and ring finger, are often points of stress when posing or handling. A slight bump or an awkward angle can put undue pressure on these areas.
- Accidental Falls: Gravity is a BJD’s worst enemy. A doll toppling over, even from a short distance, can easily result in a broken finger as they often land on their hands.
- Improper Handling: Sometimes, in our excitement, we might grip a doll too tightly or try to force a pose, leading to a snap.
Immediate Care: What to do when a finger breaks
The moment you discover a broken finger, your first instinct might be panic, followed by a desire to fix it immediately. Stop! Based on my experience with over a hundred broken finger cases, the most common mistake owners make is trying to glue it back together with household superglue. This can actually make a professional repair much harder, as it can damage the resin and leave unsightly residue.
Instead, here’s your “first aid” protocol:
- Collect All Fragments: Carefully search for every tiny piece of the broken finger. Even the smallest sliver can be crucial for a seamless repair. Place them in a small, sealed baggie.
- Do NOT Glue: Resist the urge to use any adhesive. Strong glues can alter the resin’s structure, making future, more effective repairs difficult and potentially leaving permanent marks.
- Document: Take clear photos of the damage from multiple angles. This will be invaluable for assessing the extent of the break later.
- Store Safely: Keep the doll and the collected fragments in a safe, padded container to prevent further damage.
Understanding these immediate steps can significantly impact the success and cost to repair doll later on. If you’re looking for a repair BJD broken fingers service, knowing how to prevent further damage is key. Learning how to prevent BJD breakage in the first place, through careful handling and display, is always the best approach.
The Slow Creep of Yellowing Resin: Prevention and Reality
Unlike a sudden break, resin yellowing is a slow, insidious process that can creep up on you. It’s a phenomenon I’ve studied extensively, and it’s often misunderstood.
In simple terms, yellowing is primarily an oxidation process. The resin, over time, reacts with oxygen and other environmental factors, causing a chemical change that results in a yellowish tint. While UV light (from sunlight or even strong artificial lights) is the most notorious accelerator, it’s important to understand that even dolls kept in the dark can yellow over many years.
Here’s a breakdown of the accelerating factors:
- UV Light: The biggest culprit. UV radiation breaks down the chemical bonds in the resin, leading to rapid oxidation.
- Heat: Elevated temperatures can speed up chemical reactions, including oxidation.
- Humidity: High humidity can also contribute to the degradation process.
- Air Pollutants: Smoke, dust, and other airborne chemicals can settle on the resin and accelerate yellowing.
- Contact with Certain Materials: Some plastics (like certain vinyls or rubber bands) can leach chemicals that stain or yellow resin over time.
It’s also crucial to distinguish between “surface stains” and “overall yellowing.” A surface stain might be from dye transfer or dirt, which can often be cleaned. Overall yellowing, however, is a chemical change within the resin itself. Different resin formulas also react differently; some manufacturers’ resins are more prone to yellowing than others, a fact I’ve observed across countless brands over the years.
For those concerned about BJD resin yellowing restoration cost or seeking BJD resin care tips, prevention is always better than cure. Investing in UV protection for BJD dolls through display cases or UV-filtering windows can significantly slow down this process.
Your BJD Restoration Roadmap: From Assessment to Aftercare
Once you’ve identified the issue, the next step is to plan the restoration. This roadmap will guide you through the process, whether you choose to DIY or seek professional help.
Step 1: Diagnosis – What Are You Really Dealing With?
Before any repair, a thorough assessment is critical. This is where you put on your detective hat.
- For Broken Parts:
- Is it a clean break, or are there multiple shattered pieces?
- Is the break point smooth or jagged?
- Are there any other hairline cracks (stress cracks) radiating from the break point?
- Are there any missing fragments?
- Crucially, take detailed, well-lit photos from various angles. These will be essential for a professional to provide an accurate quote and plan.
- For Yellowing Resin:
- Is the yellowing uniform across the entire doll, or is it localized (e.g., one arm is yellower than the rest)? Localized yellowing might indicate uneven light exposure.
- Is it a subtle creaminess, or a deep, almost orange hue? The severity impacts the restoration approach.
- Is it truly yellowing, or could it be surface dirt or dye transfer? Try a gentle wipe with a magic eraser on an inconspicuous spot (like the inside of a thigh) to rule out surface grime.
- Compare the doll to a known “white” resin piece if you have one, or to photos of the doll when it was new.
This initial diagnosis helps you understand the scope of the problem and prepare for the next step.
Step 2: The Decision – DIY vs. Professional BJD Restoration Service
This is often the toughest decision for doll owners. I’ve seen many try DIY with varying results, and while I admire the spirit, it’s important to be realistic.
Here’s a balanced comparison based on my extensive experience:
DIY BJD Repair:
- Pros:
- Cost-effective: You save on labor fees.
- Sense of accomplishment: Successfully fixing your doll can be incredibly rewarding.
- Immediate gratification: No waiting for a professional.
- Cons:
- High risk of error: Without proper technique and tools, you can easily cause further, irreversible damage. I’ve seen many cases where a DIY attempt made the professional repair much more complex and expensive.
- Requires specific skills: Resin work, color matching, and delicate handling are not intuitive.
- Tool and material investment: You’ll need specialized glues (like high-strength AB epoxy or UV-curing resin), fillers, sandpaper, paints, and protective coatings.
- Potential for poor results: Visible seams, mismatched colors, or weakened joints are common outcomes.
- No warranty: If you mess up, you’re on your own.
- Not suitable for complex issues: Severe yellowing, multiple breaks, or internal stress cracks are usually beyond the scope of a beginner.
Professional BJD Restoration Service:
- Pros:
- Guaranteed results: Reputable restorers offer high-quality, seamless repairs.
- Expertise and experience: They know the nuances of different resin types and repair techniques.
- Specialized tools and materials: Access to professional-grade adhesives, fillers, pigments, and protective coatings.
- Safety: Professionals understand the risks of chemicals and take appropriate precautions.
- Handles complex issues: From intricate finger repairs to full-body yellowing reversal, they can tackle problems you can’t.
- Peace of mind: Knowing your doll is in capable hands.
- Potential for warranty: Many services offer a guarantee on their work.
- Cons:
- Higher cost: You’re paying for expertise, time, and materials.
- Waiting time: Professional services often have a queue, especially for popular restorers.
- Shipping risks: The doll needs to be shipped, which carries its own set of risks.
While DIY can be tempting, especially for minor issues or if you’re working on a low-value practice piece, I always advise caution. For your cherished dolls, especially with significant damage, a professional BJD cleaning and repair service is almost always the safer and more effective choice. It’s an investment in the longevity and beauty of your doll. When considering the DIY BJD repair risks, the peace of mind from a professional is often worth the cost. You might even search for “BJD doll hospital services near me” to find local experts.
Inside the Workshop: What Does a Professional BJD Restoration Service Do?
This is where the magic happens, and where my 15+ years of experience truly come into play. Let me walk you through the meticulous process a professional restorer undertakes.
The Art of Fixing Broken Fingers and Stress Cracks
When a doll with a broken finger or BJD stress cracks arrives in my workshop, it’s not just about gluing pieces together; it’s about understanding the resin, the stress points, and ensuring the repair is stronger than the original break.
Here’s how a professional approaches it:
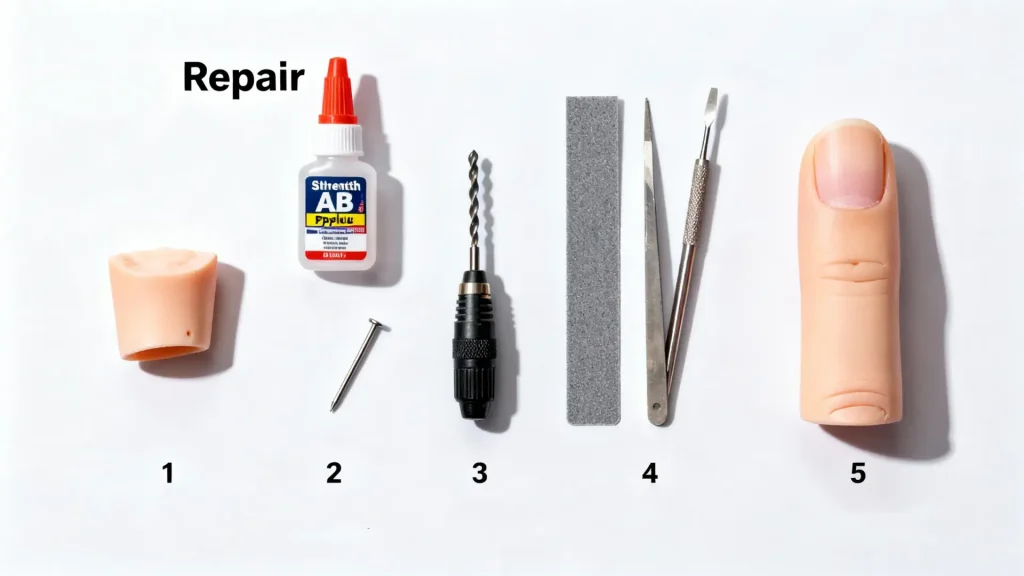
- Assessment & Cleaning: First, I thoroughly clean the damaged area. Any dirt, old glue residue, or paint needs to be removed to ensure a perfect bond. I use specialized solvents that won’t harm the resin. I then meticulously assess the break, noting the type of fracture, the number of fragments, and if there are any hidden stress cracks.
- Precision Alignment & Bonding: This is the most critical step. Using magnification, I precisely align the broken pieces. For a clean break, I’ll use a high-strength, clear AB epoxy glue or a specialized UV-curing resin. The choice depends on the resin type and the specific break. I apply the adhesive sparingly, ensuring it penetrates the break without oozing out. The curing process is carefully controlled, sometimes using UV light or specific temperatures.
- Reinforcement (Pinning/Doweling): For breaks in high-stress areas or particularly delicate parts, simple gluing isn’t enough. This is where pinning or doweling comes in. I’ll carefully drill tiny holes into the broken pieces and insert a small metal pin (like a brass rod) or a resin dowel. This acts like rebar in concrete, providing internal structural support. This technique is crucial for preventing future breaks at the same spot and is often necessary for a robust BJD joint repair.
- Seamless Finishing: Once the adhesive is fully cured and reinforced, the real artistry begins. I use fine-grit sandpaper and specialized sculpting tools to smooth out any excess glue or unevenness. If there are small gaps or chips, I’ll use a resin-compatible filler (like Magic Sculpt or a similar epoxy putty) to rebuild the missing material. This is a painstaking process of filling, sanding, and shaping until the repaired area is perfectly smooth and seamlessly integrated with the original sculpt.
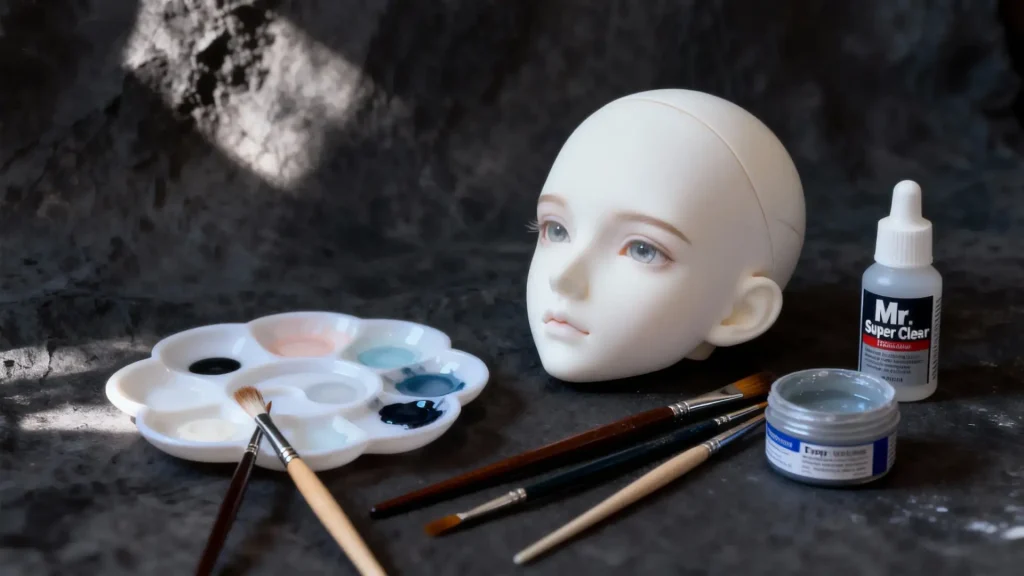
- Color Matching & Protection: Even with the most careful repair, there might be a slight discoloration or a need to blend the repaired area. I meticulously mix acrylic paints to precisely match the doll’s resin color. This is often done in thin, translucent layers to avoid a “painted-on” look. Finally, a protective clear coat, such as Mr. Super Clear UV Cut or a similar water-based sealant, is applied to seal the repair and provide an extra layer of durability.
The goal is always an invisible repair, where you can’t tell there was ever a break. This level of detail is why the fix BJD stress cracks price can vary, as it reflects the time and skill involved.
Reversing Time: The Process of Resin Yellowing Restoration
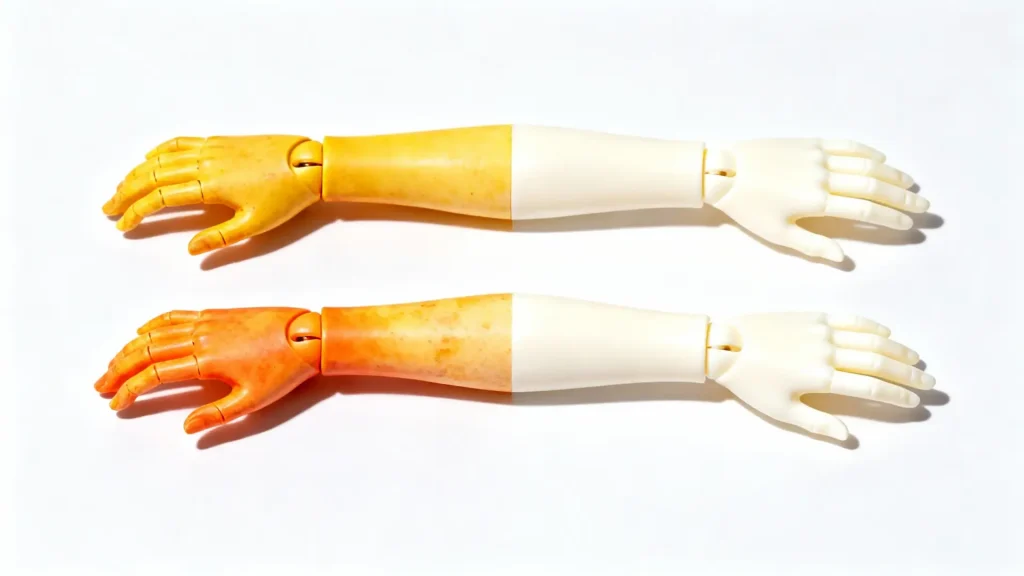
When it comes to yellowing, it’s important to manage expectations. We don’t “reverse” time completely; rather, we perform a controlled oxidation-reduction treatment to lighten the yellowing. The degree of success depends heavily on the severity of the yellowing and the specific resin formula. Some resins respond beautifully, while others are more stubborn.
Here’s my professional process for BJD yellowing removal methods:
- Complete Disassembly & Thorough Cleaning: The doll is fully disassembled. Each part is then meticulously cleaned to remove any surface dirt, dust, or old sealant. This ensures the treatment can penetrate the resin effectively.
- Surface Preparation (Optional Light sanding): For very stubborn or uneven yellowing, I might perform a very light, high-grit sanding of the surface. This removes the outermost oxidized layer, allowing the treatment to work more efficiently. This is done with extreme caution to preserve the sculpt’s detail.
- Controlled Oxidation-Reduction Treatment: This is the core of the process. I use a professional-grade hydrogen peroxide gel (often 12-20% concentration, sometimes higher for severe cases) specifically formulated for resin. The parts are carefully coated and then exposed to UV light (either natural sunlight or a UV lamp) in a controlled environment.
- Warning: This step is highly risky for DIY. Never use household bleach or high-concentration hydrogen peroxide without proper safety gear and knowledge. Different resin formulas react differently, and improper application can lead to irreversible damage, brittleness, or uneven bleaching. Always perform a patch test on an inconspicuous area first.
- Time Control: The parts are monitored constantly. The duration of exposure is critical – too little, and the yellowing remains; too much, and the resin can become chalky, brittle, or even develop a bluish tint. This is where experience truly matters.
- Neutralization & Rinsing: Once the desired level of lightening is achieved, the parts are thoroughly rinsed with distilled water to remove all traces of the peroxide. A neutralizing solution might be used to ensure the process is completely halted.
- Final Protection & Reassembly: After drying completely, each part is sprayed with a high-quality UV-resistant clear coat, such as Mr. Super Clear UV Cut or a similar product. This provides a protective barrier against future yellowing. Finally, the doll is carefully reassembled, re-strung, and checked for proper articulation.
The BJD restoration cost breakdown for yellowing reflects the labor-intensive nature of this process, the specialized materials, and the expertise required to achieve a safe and effective result. The safety precautions for BJD resin bleaching safety cannot be overstated.
Investing in the Future: Cost, Time, and Choosing the Right Service
Deciding to send your doll for professional restoration is a significant step. It’s an investment, both financially and emotionally.
Please note, the following are example price ranges based on observations in the North American market (in USD), intended to help you establish a budget concept. Specific costs will vary significantly based on the restorer’s location, reputation, the severity of damage, and the specific resin type. Always obtain a direct quote from your chosen service provider.
| Service | Approximate Cost Range (USD) | Typical Turnaround Time |
|---|---|---|
| Single Broken Finger Repair | 50−50−150+ | 2-4 weeks |
| Multiple Broken Fingers | 150−150−400+ | 3-6 weeks |
| Mild Resin Yellowing Restoration | 200−200−500+ | 4-8 weeks |
| Severe Yellowing + Full Body Repair | 500−500−1500+ | 6-12+ weeks |
How to Choose a Reliable BJD Restoration Service:
Choosing the right person to entrust your beloved doll to is paramount. Here’s a checklist I recommend:
- Portfolio/Work Samples: Do they have a strong portfolio of before-and-after photos? Look for seamless repairs and natural-looking resin.
- Reviews & Testimonials: What do other collectors say about their work? Look for consistent positive feedback.
- Communication: Are they responsive, clear, and willing to answer all your questions? Good communication is a sign of professionalism.
- Materials Used: Ask about the specific glues, fillers, and protective coatings they use. Reputable restorers are transparent about their methods.
- Process & Timeline: Do they clearly explain their process and provide an estimated timeline?
- Insurance/Shipping: Do they offer advice on safe shipping? Do they have insurance for items in their care?
- Warranty: Do they offer any guarantee on their work?
- Specialization: Do they specialize in BJD restoration, or is it a side hobby? Experience with BJD resin is crucial.
Searching for “BJD restoration service reviews” and “how to choose BJD repair shop” can provide valuable insights from the community.
BJD Restoration FAQ: Your Top Questions Answered
I get a lot of questions from worried doll owners. Here are some of the most common ones, answered with my professional insights.
“Can I prevent my BJD from yellowing?”
Absolutely! While you can’t stop the aging process entirely, you can significantly slow down yellowing. My top tips for BJD resin care tips and prevention are:
- Avoid Direct Sunlight: This is the golden rule. Keep your dolls away from windows or any area with direct sun exposure.
- Control Artificial Light: Strong artificial lights, especially those with high UV output, can also contribute. Consider UV-filtering display cases or bulbs.
- Stable Environment: Maintain a stable temperature and humidity. Extreme fluctuations can stress the resin.
- Dust Protection: Keep your dolls in display cases or dust-proof bags. Dust can contain pollutants that accelerate yellowing.
- Regular Cleaning: Gently wipe your dolls down with a soft, dry cloth regularly to remove surface contaminants.
- Beware of Contact: Avoid prolonged contact with certain materials like rubber bands, dark fabrics that might bleed dye, or certain plastics that can leach chemicals.
“Is a DIY repair always a bad idea?”
Not always, but it comes with significant caveats. As I mentioned earlier, for very minor, non-structural issues on a less valuable part (like a spare hand or foot), and only if you’ve thoroughly researched and practiced the techniques, DIY might be an option. However, for anything structural, visible, or involving the main body, I strongly advise against it. The DIY BJD repair risks are simply too high. You risk making the damage worse, creating an unsightly repair, or even devaluing your doll. If you’re asking “BJD finger broken what to do?”, my first answer is always to consider professional help.
“How much does it cost to fix BJD stress cracks?”
The cost to fix BJD stress cracks varies widely, similar to broken fingers. It depends on:
- Length and Depth: A hairline crack is less involved than a deep, long crack.
- Location: A crack on a flat surface is easier to repair than one in a complex joint or sculpted area.
- Need for Reinforcement: If the crack is in a high-stress area, it might require internal pinning, increasing the labor.
- Repainting/Blushing: If the crack affects face-up or body blushing, additional costs for touch-ups will apply.
Refer back to the general price range table above for a rough idea, but always get a specific quote from a restorer.
“What’s the difference between a ‘cleaning service’ and a full ‘restoration’?”
This is an important distinction!
- Cleaning Service: Typically involves surface cleaning, removing dust, dirt, and possibly light stains. It might include re-stringing, tightening joints, and general maintenance. It’s about refreshing the doll’s appearance and functionality without addressing structural damage or deep-seated issues.
- Full Restoration: This is a much more intensive process. It addresses structural damage (like breaks, cracks), significant aesthetic issues (like severe yellowing, deep scratches), and aims to bring the doll back to its original or near-original condition. It involves specialized techniques, materials, and significant labor.
“How long does BJD resin last before yellowing?”
There’s no fixed answer to “how long does BJD resin last before yellowing?” It’s like asking how long a car’s paint will last – it depends on the car, how it’s stored, and how it’s driven. For BJDs, it depends on:
- Resin Formula: Some manufacturers use more UV-resistant resins than others.
- Storage Environment: As discussed, light, heat, and humidity play a huge role.
- Exposure: A doll displayed in a sunny room will yellow much faster than one kept in a dark closet.
Generally, you might start to notice subtle yellowing after a few years (3-5 years) for some resins, while others might take a decade or more. It’s a gradual process, so regular checks are key.
A New Beginning for Your Beloved BJD
Discovering damage to your BJD can be a truly disheartening experience. But as someone who has dedicated over a decade and a half to bringing these beautiful creations back to life, I want to assure you that it’s rarely the end. Whether you choose the careful path of DIY for minor issues or entrust your doll to a professional BJD restoration service, there is hope.
Ultimately, our love for these artistic dolls drives us to care for them, to protect them, and to restore them when they falter. It’s a process of patience, skill, and deep affection. By understanding the issues, making informed decisions, and seeking the right help, you can ensure your cherished BJD continues to bring you joy for many years to come. It’s not just a repair; it’s an act of giving new life, a testament to the enduring bond we share with these incredible works of art.
BJD Customization & Maintenance Series
- Your 2025 BJD Faceup Tutorial: A Pro’s Guide to Soulful Art
- How to String a BJD: A Veteran’s No-Nonsense Guide
- Pristine Resin: How to Clean a BJD Doll The Right Way
- BJD Customization: The Ultimate Guide to Personalizing Your Doll
- BJD Body Blushing: The Alchemist’s Guide to Skin That Breathes
- Make BJD Doll Eyes: An Alchemist’s Guide to Painting Soulful Gaze
- BJD Wig Styling Mastery: The Ultimate Care, Cutting & Customization Guide
- The Ultimate BJD Clothing Guide: Design, Patterns & Fit
- Ultimate BJD Storage Guide: Beat Yellowing with Pro Display Ideas
- BJD Faceup Pricing Guide: Unpacking Custom Eye Chips & Lip Blushing Costs
- Bringing Them Back to Life: Your Guide to BJD Restoration Service for Broken Fingers & Yellowed Resin (You are here)
- BJD Stringing Kits: DIY Tightening for Stable, Pro Posing
- BJD Customization Services: Faceup & Full Body Blushing Guide
- BJD Body Modification: Sculpting Your Doll‘s Unique Form (2025 Guide)
- Mastering BJD Seam Sanding: A Pro’s Guide to Flawless Resin Finishes
- BJD Joint Maintenance: Keeping Your Doll Posing Perfectly for Years
- BJD Eye Well Modification: Achieving Deeper, More Expressive Gaze
- Mastering Advanced BJD Faceups: Beyond Basics to Lifelike Artistry
- BJD Resin Whitening & Anti-Yellowing: A Collector’s Proven Guide to Preserve Beauty
- BJD Stringing Tension Guide: Optimizing Posing & Stability
- BJD Magnet Installation: The Ultimate Safety Guide to Unlocking Dynamic Posing