The Awakening of the Muse: My First Glimpse of a Doll’s Soul
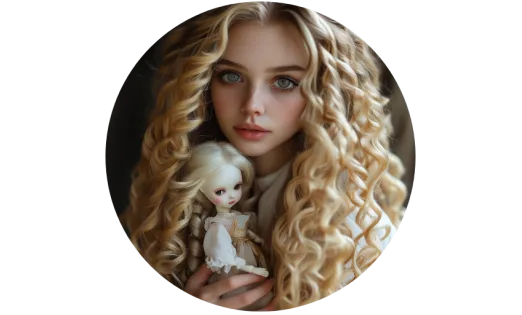
I remember it like it was yesterday. Ten years ago, I was a fledgling photographer, fumbling with my first BJD. I’d spent hours posing her, adjusting her tiny clothes, trying to get that perfect, static shot. But something was missing. She looked beautiful, yes, but lifeless. Then, one afternoon, the sun streamed through my window, catching her face at just the right angle. A stray beam illuminated her eyes, and for a fleeting moment, I saw it – a flicker of personality, a hint of a story untold. It wasn’t just a doll anymore; it was a character, brimming with potential. In that instant, my camera wasn’t just a tool; it became a conduit, a means to capture the invisible. That feeling, that sudden, profound connection, was my muse awakening. This guide isn’t just about taking pictures; it’s about finding your muse, about learning the spellcraft to reveal the soul within your BJD. And I promise you, by the end of this, you’ll feel that spark, that undeniable urge to create.
Gear Without Fear: Your Quick Start to BJD Photography
Let’s dispel the myth right now: you do not need expensive equipment to create breathtaking BJD photography. The most powerful tools you possess are your eyes, your imagination, and the light around you. What you already have is more than enough to begin your journey into soul-capturing spellcraft.
Your Pocket-Sized Magic Box: The Smartphone
Forget the bulky DSLRs for a moment. Your smartphone is a marvel of modern technology, a powerful camera disguised as an everyday device. It’s your “pocket-sized magic box,” always ready to capture a moment. The key is knowing its hidden powers.
Instant Magic: Turn on your camera’s grid lines! This often-overlooked feature is a game-changer for composition, helping you apply the rule of thirds effortlessly. Go to your phone’s camera settings, find “Grid” or “Grid Lines,” and switch it on. You’ll immediately notice how much easier it is to frame your shots.
The Anchor of Stability: The Tripod
A tripod isn’t just for professional studios; it’s your “anchor of stability,” especially when working with natural light or trying to achieve sharp focus. And no, you don’t need a heavy-duty one. My early days were filled with adventures using a cheap, flexible octopus tripod. I’d wrap its bendy legs around stair railings, perch it on tree branches, or even balance it precariously on a stack of books. These humble tools allowed me to experiment with longer exposures and precise framing, creating images that felt impossible just moments before.
Instant Magic: Grab any small, flexible tripod (or even a stack of books!). Place your doll, set up your phone on the tripod, and use the self-timer function. This simple act eliminates camera shake, resulting in noticeably sharper images, especially in lower light.
The Stage Curtain: Backgrounds
The background is more than just what’s behind your doll; it’s the stage curtain that either enhances or detracts from your narrative. My obsession with velvet fabric began precisely because of its magical properties. Velvet, especially dark colors, has an incredible ability to “swallow” light, creating a deep, rich backdrop that makes your doll pop. It eliminates distractions and ensures your BJD remains the absolute protagonist of your story.
Instant Magic: Find a piece of dark, matte fabric – velvet, felt, or even a dark t-shirt. Drape it smoothly behind your doll. Notice how the doll instantly becomes the focal point, free from distracting clutter. This simple trick elevates your doll photography lighting setup instantly.
Composing the Spell: Pose, Angle, and Story
This is where the true magic begins – transforming a static object into a living character. My core philosophy here is simple: “Let the doll breathe, don’t just place it.” Every pose, every angle, should contribute to the story you’re trying to tell, making your BJD feel alive and expressive.
The Art of Movement: Posing Your BJD
Posing isn’t about forcing your doll into a position; it’s about understanding its anatomy and finding the natural flow of movement. My exclusive secret is the “center of gravity shift” and “gaze guidance.” Think about how humans stand or sit – there’s always a subtle shift of weight, a slight lean. Replicate this with your BJD. If she’s leaning against a wall, ensure her weight appears to be resting on that side. If she’s looking at something, angle her head and body slightly towards it, creating a sense of engagement. Her gaze, even if painted, can be incredibly powerful. Direct it slightly off-camera for a contemplative look, or directly at the lens for a bold statement.
Instant Magic: Pose your doll in a simple sitting position. Now, subtly shift her weight to one hip, and gently turn her head to look slightly past the camera. Take a photo. Then, shift her weight to the other hip and turn her head in the opposite direction. Compare the two. You’ll see how these tiny adjustments create vastly different emotional tones, making her appear more natural and less stiff.
The Perspective Adventure: Angles

Your camera’s angle is your most potent storytelling device. It dictates how the viewer perceives your doll and the world around her. I challenge you to embark on a “perspective adventure.” Don’t just shoot from eye level. Get down low, almost lying on the floor, to capture your doll from her own perspective, making her seem grander, more immersed in her miniature world. Or, stand on a chair, shooting downwards, to create a sense of vulnerability or contemplation. Experiment! The world looks entirely different from a doll’s height.
Safety First: While exploring these adventurous angles, always prioritize your doll’s safety. When placing your BJD in higher positions (like on a chair, shelf, or tree branch), ensure she is stable and secure. Consider placing soft padding (like a blanket or pillow) underneath to cushion any accidental falls. Safety always comes first!
Instant Magic: Take two photos of your doll. For the first, shoot from your eye level. For the second, get down low, so your camera is at the doll’s eye level or even slightly below. Notice how the low angle instantly makes your doll feel more imposing and present, drawing the viewer into her world.
Weaving the Narrative: Storytelling
Every photograph is a single frame of a larger story. What is your doll doing? What is she feeling? Even a simple prop can transform a pose into a narrative. A tiny book, a miniature teacup, or even a fallen leaf can suggest an entire world of activity and emotion.
To help you conjure a narrative, try this simple “story starter” before your next shoot: Ask yourself three questions:
- Who is my doll? (What’s her personality, her role?)
- What has she just discovered? (A secret, a new place, an object?)
- What will she do next? (React, explore, ponder?)
Even a vague answer to one of these questions can immediately guide your composition and posing, adding layers of meaning to your image.
Instant Magic: Place a small, everyday object near your doll – perhaps a tiny flower, a button, or a coin. Pose your doll as if she is interacting with it, looking at it, or reaching for it. This simple addition immediately adds context and narrative, turning a portrait into a scene.
When you master the magic of posture, capturing a subtle expression, you might find yourself craving even more ultimate expressiveness. At this point, delving into [Customizing Your BJD] – from eye changes to intricate face-ups – will open up a whole new world of possibilities for you.
Painting with Light: Your Most Powerful Tool
“Light is the magic of price, free and generous.” This is my mantra. You don’t need expensive studio strobes or complex setups. The most beautiful, ethereal light is often found right outside your window, or even within your home. Learning to see and manipulate light is the single most impactful skill you can develop in doll photography. This is where you truly master the best camera settings for doll photos, not through technical dials, but through observation.
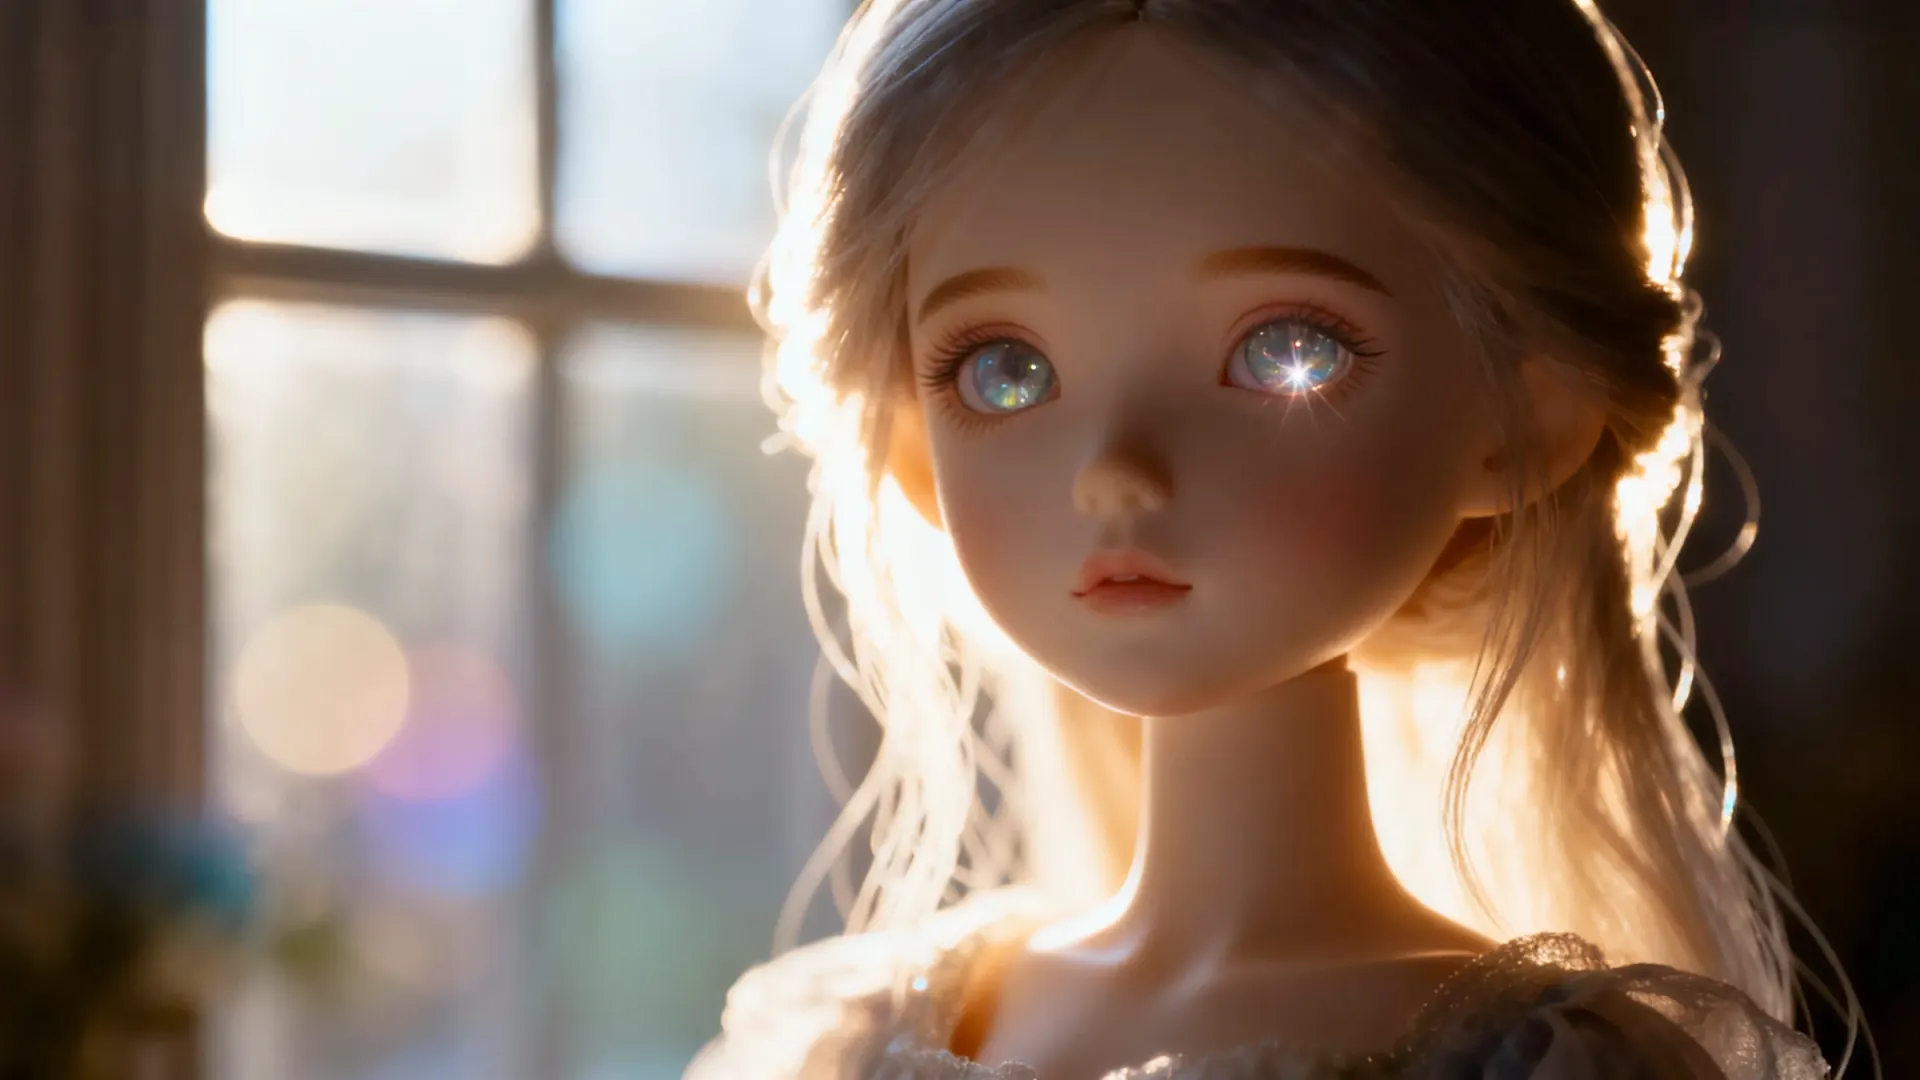
The Window’s Embrace: Natural Light
Your window is a portal to endless photographic possibilities. It’s a giant, soft light source, constantly changing, offering a spectrum of moods. Learn to draw a “light magic map” of your home. Observe how the light enters different rooms at various times of day. Is there a north-facing window that provides consistent, soft light all day? Or a west-facing one that bathes your doll in warm, golden hues during sunset?
Instant Magic: Place your doll near a window, facing towards the light. Take a photo. Now, turn your doll so the window light hits her from the side. Take another photo. See how the side light creates beautiful shadows and highlights, adding depth and dimension to her face, making her appear more sculptural and alive.
The DIY Diffuser: Your Milk Carton Softbox
Harsh light creates harsh shadows, which can be unflattering for your BJD. The secret to soft, beautiful light is diffusion. You don’t need a professional softbox; you can make one yourself! My favorite, surprisingly effective trick is the “milk carton softbox.”
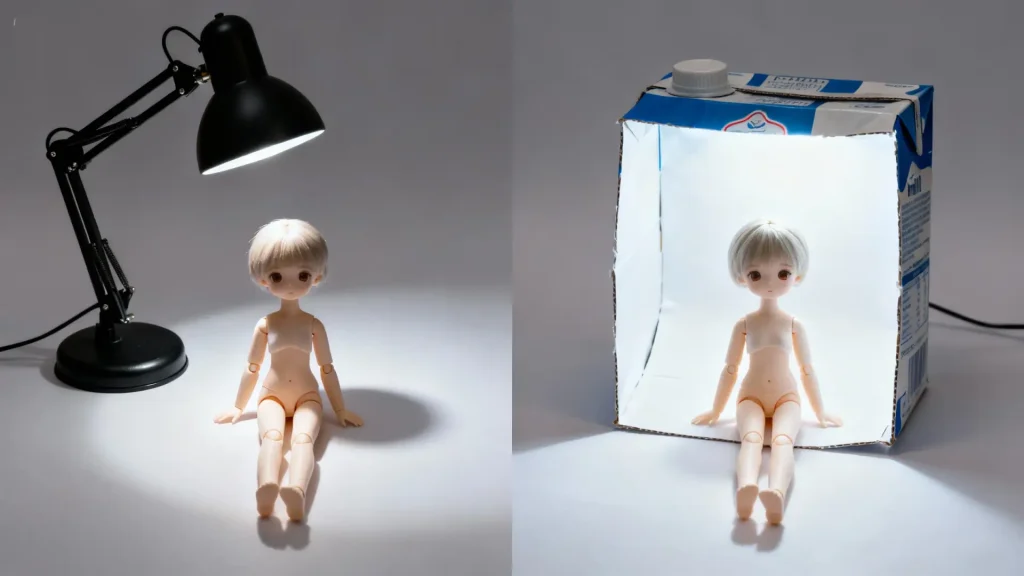
How to make it: Take an empty, clean milk carton (or any similar cardboard box). Cut out one side. Cover the opening with a piece of white tissue paper or parchment paper, taping it securely. Now, place this DIY diffuser between your light source (like a desk lamp or even a bright window) and your doll. The paper will scatter the light, transforming harsh beams into a gentle, even glow, turning those stark shadows into soft, flattering gradients.
Instant Magic: Find a desk lamp or a strong flashlight. Shine it directly on your doll. Notice the harsh shadows. Now, hold a piece of white tissue paper or parchment paper between the light source and your doll. Observe how the shadows soften dramatically, creating a much more pleasing and professional look.
Turning Traps into Triumphs: Backlight Silhouettes
Midday sun can be a photographer’s nightmare, creating harsh, unflattering light. But what if we could turn this “trap” into an opportunity? Enter the “backlight silhouette” technique. Position your doll directly in front of a strong light source (like a bright window or the sun), ensuring the light is behind her. Expose for the brightest part of the background, letting your doll fall into shadow. The result is a dramatic, artistic silhouette that emphasizes her form and creates a sense of mystery.
Instant Magic: Place your doll directly in front of a very bright window or even outdoors with the sun behind her. Frame your shot so the light source is visible behind the doll. Take the photo. You’ll capture a striking silhouette, transforming what might have been an overexposed, harsh image into a dramatic, artistic statement.
Crafting Miniature Worlds: DIY Scenes on a Budget
As a soul-capturing artist, you’re not just a photographer; you’re a world-builder. Your mission is to “re-examine your world with the eyes of a magician.” Every mundane object holds potential for enchantment.
The Treasure Hunt: Prop Scavenging
My most cherished “alchemy” moments come from transforming everyday items into magical props. Who knew that dried pasta could become ancient scrolls, or that a stack of old, discarded books could form the backdrop for a mysterious, scholarly library? Look around your home, your garden, even your recycling bin. A fallen leaf becomes a giant umbrella, a bottle cap transforms into a shield, a piece of bark becomes a rugged landscape. The key is to see beyond the object’s intended purpose and imagine its miniature potential. This is how you find cheap bjd photo props that tell a story.
Instant Magic: Go on a 5-minute “prop treasure hunt” in your home. Find three small, interesting objects – a button, a leaf, a piece of string, a bottle cap. Place one near your doll and try to build a tiny narrative around it. You’ll be amazed at how quickly your imagination sparks.
The Ultimate DIY: The Foldable Miniature Scene Board
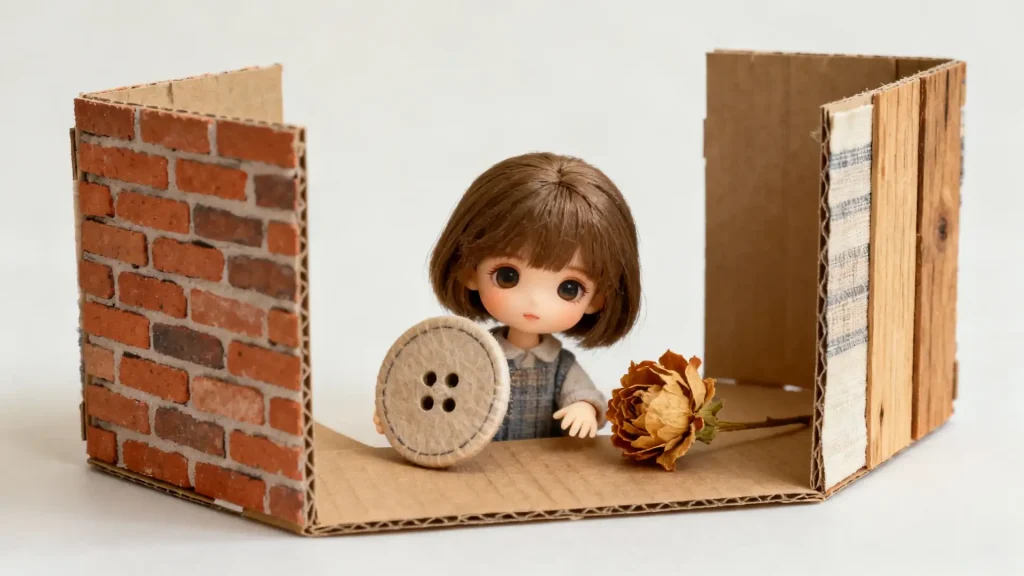
You don’t need a dedicated diorama room. My secret weapon for creating diverse miniature worlds on demand is the “foldable miniature scene board.”
How to make it: Take a large piece of sturdy cardboard (like from a moving box). Cut it into three equal panels, hinged together with strong tape (like duct tape) so it can stand freely in a “U” shape. Now, the fun begins! On each panel, glue or tape different textured materials: a piece of faux fur for a snowy landscape, a swatch of patterned fabric for an interior wall, a sheet of scrapbook paper with a brick pattern, or even just a piece of painted cardboard. You can even use double-sided tape to attach temporary textures. This versatile board allows you to quickly change your doll’s environment, offering endless backdrops for your stories.
Instant Magic: Find a piece of cardboard (even a cereal box will do). Cut it open and lay it flat. On one side, tape or glue a piece of textured paper or fabric. On the other, leave it plain or paint it a solid color. Now, fold it into an L-shape or U-shape and place your doll in front of it. You’ve just created a custom, portable backdrop in minutes!
Once the stage is set, your doll will naturally begin to perform. If you wish to add even more intricate details to this play, a comprehensive [BJD Accessories Guide] will be your ultimate treasure trove.
The Final Enchantment: Simple Photo Editing
Editing isn’t about falsifying reality; it’s about refining the magic you’ve already captured. It’s about making the soul you’ve glimpsed shine even brighter. Think of it as polishing a precious gem.
Your Digital Alchemy Tools: App Recommendations
You don’t need complex, expensive software. Your smartphone is, once again, your ally. My go-to apps are Snapseed and VSCO.
- Snapseed: Its “Selective Adjust” tool is pure magic. It allows you to brighten specific areas, increase contrast, or adjust saturation on just a tiny part of your image without affecting the rest. This is invaluable for bringing out details in your doll’s eyes or highlighting a specific prop.
- VSCO: Known for its beautiful, film-inspired “preset filters.” The trick here isn’t to slap on a filter and call it a day, but to apply a preset and then subtly adjust its intensity and other parameters (like exposure or contrast) to perfectly match your vision.
Instant Magic: Open one of your doll photos in Snapseed. Use the “Selective Adjust” tool to tap on your doll’s eyes. Gently increase the brightness and structure just in that tiny area. See how her eyes instantly become more captivating and alive.
The Four Pillars of Polish: Brightness, Contrast, Color, Sharpness
These are your “four golden rules” of editing, the fundamental adjustments that can transform a good photo into a great one.
- Brightness: Adjust to ensure your image isn’t too dark or too blown out.
- Jointed Muse Safety Parameter: Aim for a natural look. If your doll’s face looks too dark, gently increase brightness. If highlights are disappearing, slightly decrease it.
- Contrast: This defines the difference between light and dark areas, adding depth.
- Jointed Muse Safety Parameter: A slight increase often adds “pop” and dimension. Be careful not to overdo it, or shadows will become too harsh.
- Color (Saturation/Warmth): Adjust to enhance or correct the mood.
- Jointed Muse Safety Parameter: A tiny bump in saturation can make colors richer. For warmth, a slight increase can add a cozy, inviting feel, while a decrease can create a cooler, more melancholic tone.
- Sharpness: Brings out fine details.
- Jointed Muse Safety Parameter: Use sparingly! Too much sharpness can introduce digital noise. A gentle touch is usually all that’s needed to make details like hair or fabric textures stand out.
Instant Magic: Take any photo you’ve just taken. Open it in your preferred editing app. Increase the contrast by about 10-15%. Then, slightly increase the sharpness by 5-10%. You’ll immediately notice how the image gains clarity and impact.
The Secret Weapon: Cropping
Cropping isn’t just about making your photo fit a certain size; it’s “secondary composition.” It’s a powerful tool to eliminate distractions, improve balance, and guide the viewer’s eye exactly where you want it to go. Don’t be afraid to crop aggressively if it serves the story. Sometimes, removing 50% of the original image can make the remaining 50% infinitely more compelling.
Beyond simply removing clutter, consider cropping as a narrative tool. For instance, try placing your doll at the very edge of the frame, leaving a large expanse of empty space. This can evoke feelings of loneliness, anticipation, or vastness. Alternatively, cropping off part of your doll’s body – perhaps just showing her from the waist up, or even just her hands – can create a sense of dynamic movement, mystery, or focus the viewer’s attention on a specific action or emotion.
Instant Magic: Look at a photo you’ve taken. Identify the most important element (usually your doll’s face or a key prop). Now, crop the image tightly around that element, removing any unnecessary background or empty space. See how the focus immediately shifts, making your subject more impactful. Then, try cropping the same image again, but this time, place your doll off-center, perhaps in the bottom corner, leaving two-thirds of the frame empty. Observe how this changes the mood and potential story of the image.
Your Journey Begins Now: The 24-Hour Magic Challenge
Remember that moment I described at the beginning? That “muse awakening” when I truly saw my doll’s soul? That moment wasn’t about expensive gear or complex techniques. It was about presence, observation, and a willingness to connect. You now have the tools, the philosophy, and the confidence to find your own.
This isn’t just a guide; it’s an invitation. An invitation to see your dolls not just as objects, but as canvases for your imagination, as characters waiting for their stories to be told. You’ve learned the spellcraft, from understanding the best camera settings for doll photos to creating a doll photography lighting setup with everyday items.
Your challenge, should you choose to accept it, is simple: within the next 24 hours, pick just one “instant magic” tip from this guide that resonated most with you. It could be turning on grid lines, using a milk carton diffuser, or trying a low-angle shot. Apply it. Take a photo. And when you share it, use the hashtag #JointedMuseMagic. I can’t wait to see the souls you capture.
You are never alone on this journey. In [Joining the BJD Community], there are thousands of fellow mages ready to share, inspire, and celebrate your every magical creation. Go forth, apprentice, and let your muse soar!
BJD for Beginners: The Complete Guide
- A Parent’s Guide to Choosing BJD Dolls for Kids
- Your First BJD: The Ultimate Guide for Beginners (2025)
- What is a BJD Doll? A Guide to Your Next Obsession
- How to Get Into BJD: A Guide From a Long-Time Collector
- BJD Full Set: More Than a Doll, It’s a Story in a Box
- BJD Sizes Explained: The Ultimate Guide to Ball Jointed Doll Dimensions (2025)
- How to Buy Your First BJD: A Step-by-Step Guide for Beginners
- The Resin Guardian’s Handbook: A Lifelong Guide to BJD Care and Maintenance
- Awakening the Soul: A Philosophy for Customizing Your BJD
- BJD Accessories Guide: Crafting a Universe for Your Doll
- Joining the BJD Community: Your Warm and Welcoming Guide to Doll Collecting
- Unlocking the Soul: A Beginner’s Guide to BJD Photography Magic (You are here)
- The Ultimate Guide to Buying & Selling Secondhand BJDs Safely & Smartly
- Navigating Your First BJD: An Empathetic & Realistic BJD Budget Guide for New Collectors
- Ultimate BJD Care Guide: Daily Habits to Prevent Yellowing & Damage
- BJD Eyes: The Ultimate Guide to Bringing Your Doll’s Soul to Life
- Master Indoor BJD Photography: Pro Tips for Magical Shots With Basic Gear
- BJD Unboxing 101: Your Step-by-Step Guide to a Joyful First Look
- BJD Posing Guide for Beginners: Express Emotion Without Damaging Your Doll
- You’re Welcome to the BJD Community: A Guide to Sharing, Learning & Friends
- The Definitive BJD Secondhand Buying Guide: Spot Deals & Avoid Scams