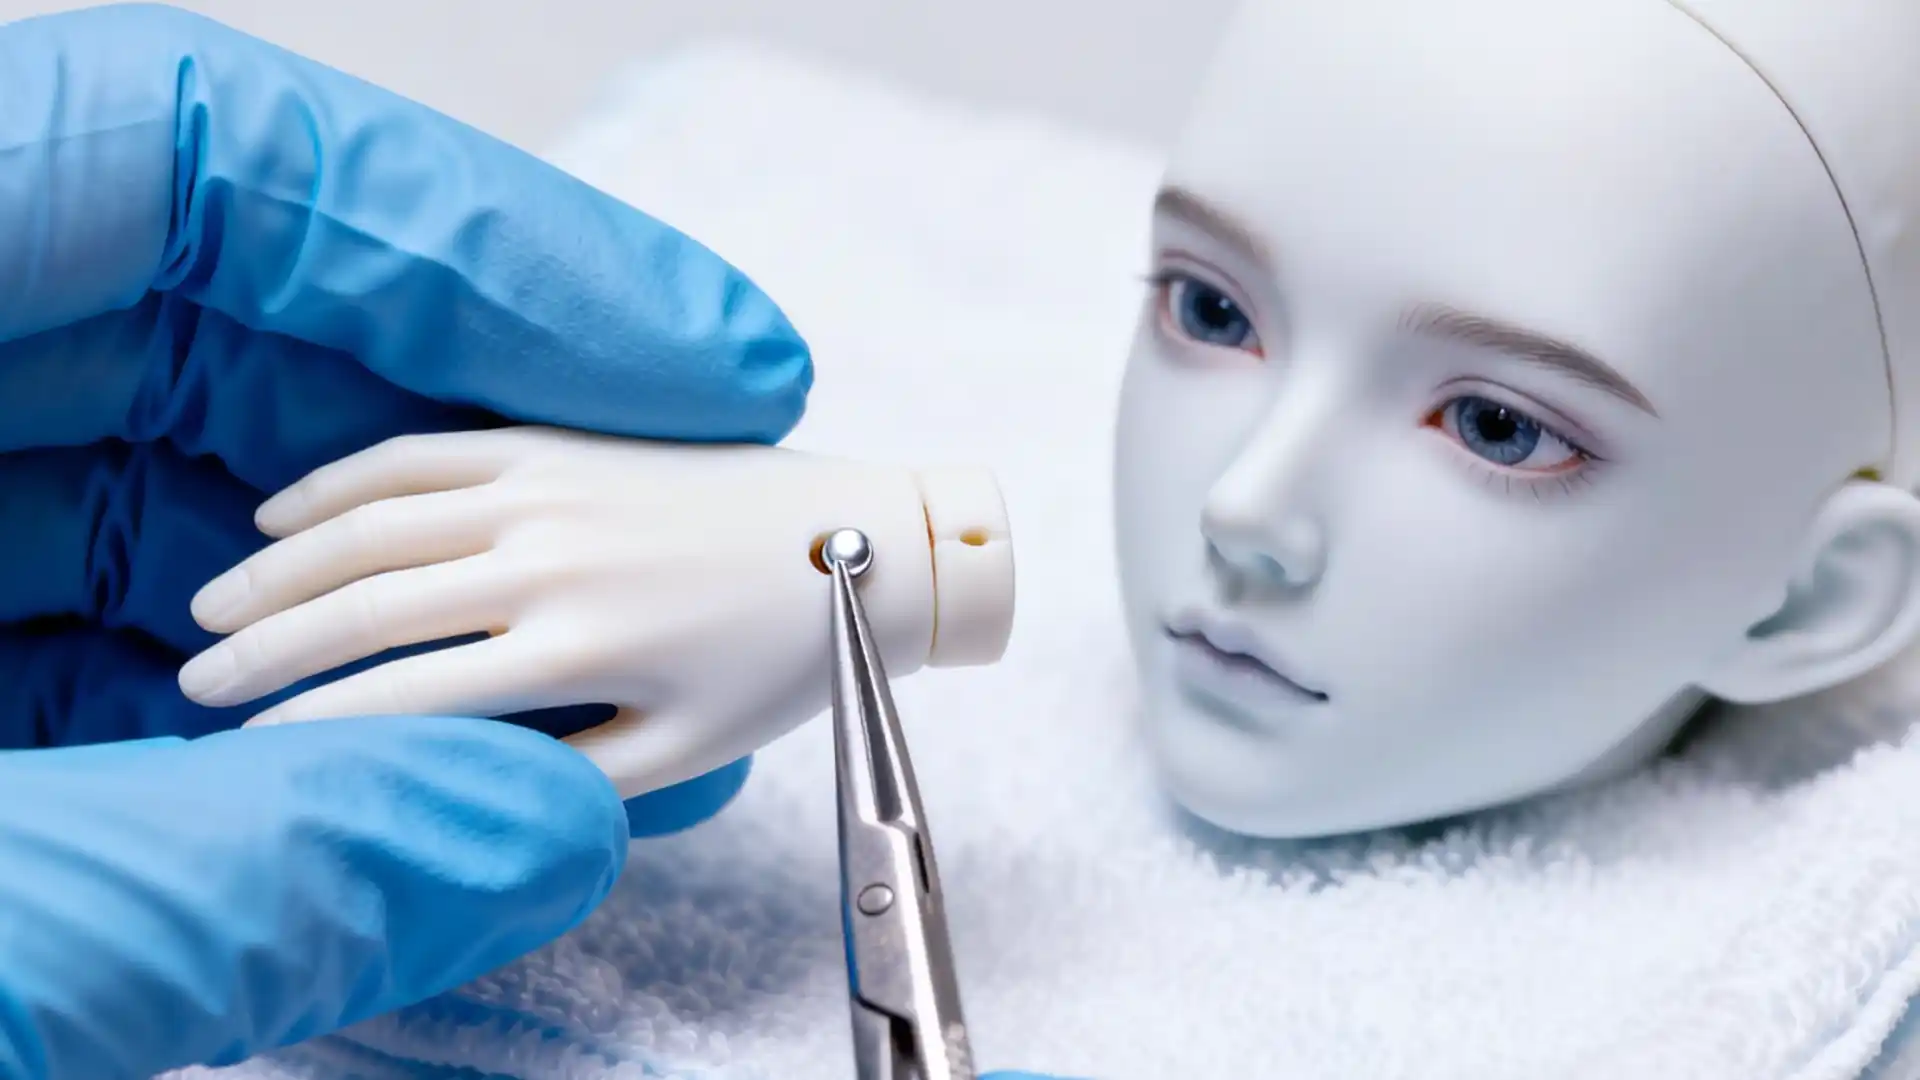
I know the feeling. You are holding a limited edition sculpt that cost you three months of savings. The resin is pristine, the face-up is a work of art, and your heart is hammering in your chest because you are about to take a metal drill bit to it.
Take a deep breath.
I have spent 15 years modifying dolls, from $500 Soom dolls to $1500 one-offs. I treat every modification like surgery: Safety First, Artistry Second.
Why do we do this? Because right now, your doll is beautiful but static. By the end of this guide, that same doll will be able to hold a sword, swap fantasy ears, or keep a wig perfectly in place. We are moving from static display to dynamic storytelling, and we are going to do it without risking a single crack in that precious resin.
⚠️ THE BIOHAZARD PROTOCOL: READ BEFORE PROCEEDING
Resin dust is not just “messy”—it is micro-particulate plastic. If inhaled, it stays in your lungs.Proper surface preparation is key. For tips on handling resin surfaces before any modification, see our guide on seam sanding and resin finishing.
- Respiratory: You MUST wear an N95 mask or a respirator. A cloth mask is insufficient.
- Vision: Wear safety goggles. A flying chip of resin or a snapped drill bit can cause permanent eye damage.
- Ventilation: Do not do this in your bedroom. Work in a well-ventilated area or near an open window.
The Physics of Choice: The “Goldilocks” Theory
Before you buy a single supply, we need to talk about physics. A common mistake in BJD modding tutorials is the assumption that “stronger is better.” It is not.
1. The Magnet Grade (N35 vs. N52)
Neodymium magnets are graded by strength. While N52 is the strongest, it is often a liability for resin.
- The Impact Risk: Imagine a 1/3 scale (SD) doll wrist. If you use a standard 6x2mm N52 magnet, the attraction force is so aggressive that when the hand snaps onto the wrist, the two resin surfaces collide with significant force.
- The Result: Over time, or specifically in winter when resin is cold and brittle, this impact causes microscopic “chipping” around the edges of the joint.
- The Sweet Spot: Stick to N35 or N40. They provide a secure hold without the violent “snap” that endangers delicate edges.
2. The Glue: A Critical Warning
🚫 PUT DOWN THE SUPER GLUE.
Never use Cyanoacrylate (Super Glue/Crazy Glue) on your BJD.
- Brittleness: It creates a rigid bond that makes the surrounding resin prone to shattering under stress.
- The Fog: It causes “blooming”—a chemical white fog that ruins the resin finish permanently.
The Solution: Use 2-part Epoxy Resin or Epoxy Glue (like Araldite). It dries clear, cures slowly, and creates a shock-absorbent seal.
Preparation: The “Measure Twice, Cut Once” Protocol
We do not rush. We prepare.
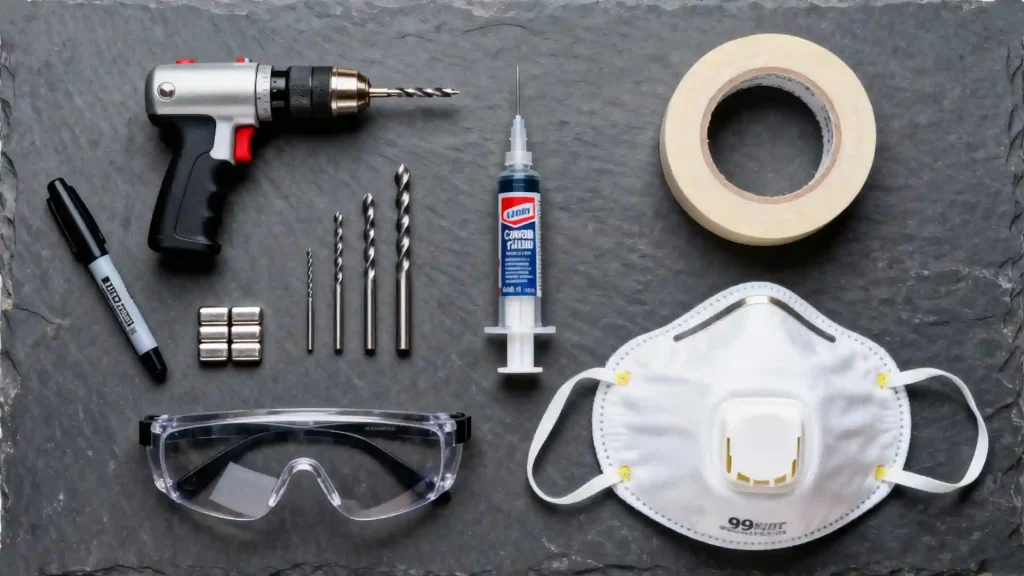
The Toolkit
- Pin Vise (Hand Drill): Do not use an electric Dremel for your first time. A hand drill gives you tactile feedback so you can feel the resin’s density.
- Drill Bits: A set ranging from 2mm to 5mm.
- Neodymium Magnets: Matched to your drill bit size (Ni-Cu-Ni plated).
- 2-Part Epoxy.
- Permanent Marker (Sharpie).
The Polarity Hack: A Sacred Ritual
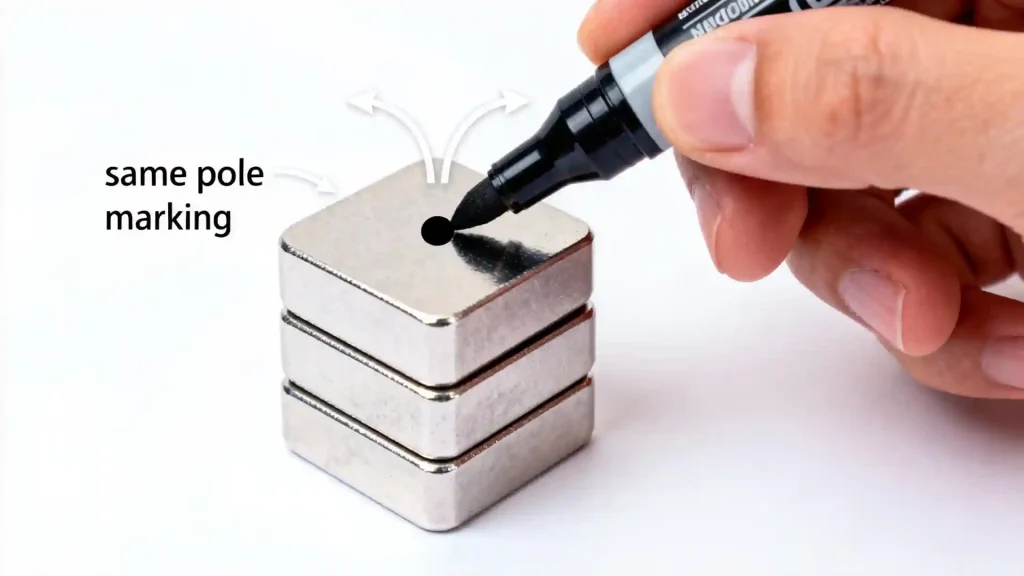
This is the only irreversible mistake in this entire process. If you glue a magnet backward, the hand will repel the wrist, and fixing it is a nightmare. We must ritualize this step.
- Take your stack of magnets.
- Draw a Black Dot on the top face of the first magnet.
- Slide it off. Draw a dot on the next one. Repeat until the whole stack is marked on the same magnetic pole.
- The Golden Rule: The Dot always faces the bottom of the hole (hidden). If you follow this for every doll in your collection, all your parts will be interchangeable forever.
📋 Pre-Flight Checklist
Do not touch the drill until you can check every box:
- Lighting: Workspace is brightly lit; no shadows on the drilling zone.
- Tools: Pin vise, correct bit size, and tape are within arm’s reach.
- Protection: Mask and Goggles are ON.
- Polarity: Every single magnet has a black dot on the same pole.
- Chemistry: You have read the mixing time for your specific Epoxy brand.
Execution: Surgical Precision (Step-by-Step)
The following is a step-by-step, safety-focused procedure. Follow it in order.
Step 1: The Pilot Hole
Do not start with the full-size drill bit. If you need a 5mm hole, start with a 2mm bit.
- Mark the center of the wrist/hand with a pencil.
- Gently twist the pin vise. You aren’t forcing it; you are letting the blade shave the resin. This prevents the bit from “skating” across the surface and scratching the doll.
Step 2: Depth Control (The Tape Flag)
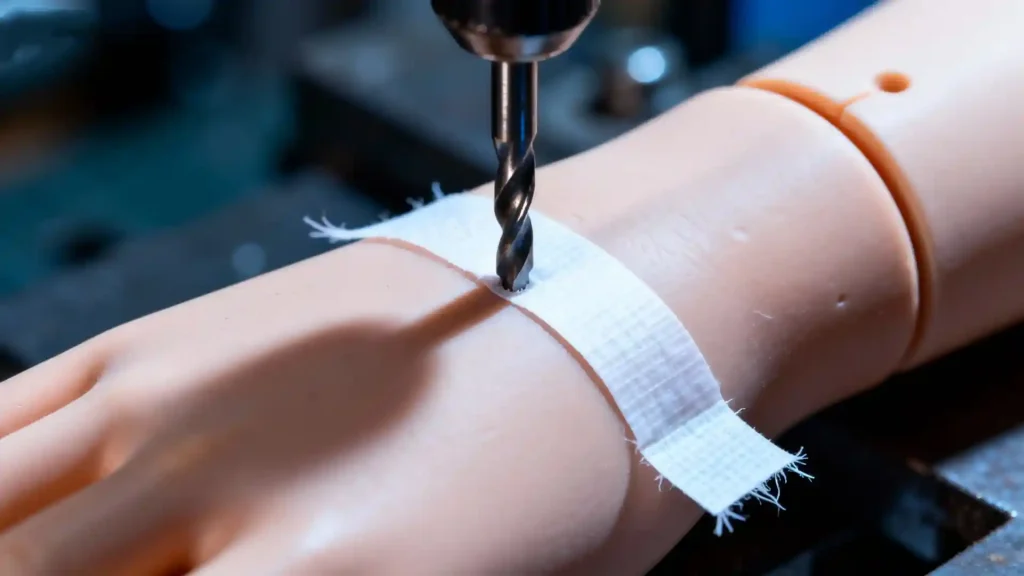
How do you ensure you don’t drill through the other side of the hand?
- Measure the thickness of your magnet against the drill bit.
- Wrap a piece of masking tape around the drill bit just slightly higher than the magnet’s height.
- Drill until the tape hits the resin. This is your physical stop-sign.
Step 3: Dry Fitting
Blow the dust away (away from your eyes!). Drop the magnet in. It should sit flush or slightly below the surface. If it sticks out, drill a few more turns.
Step 4: The “Sush” Install
- Mix your epoxy. Use a toothpick to place a tiny drop inside the hole.
- Verify Polarity: check your Sharpie Dot one last time!
- Push the magnet in.
- Wipe away excess epoxy immediately with alcohol.
💡 Veteran’s Secret:
The Cellophane Trick. To ensure perfect alignment between a hand and a wrist, put the magnets in with wet glue, place a piece of thin kitchen plastic wrap (cling film) between the parts, and connect them. The magnets will pull themselves into perfect alignment while the glue cures, and the plastic prevents you from accidentally gluing the hand to the wrist.
Troubleshooting: The Voice of Experience
Even masters make mistakes. Here is how to fix them without panic.
“I Glued It Backward…”
Don’t try to dig it out with a knife; you will chip the resin.
- The Freeze: Put the part in the freezer for 30 minutes. Resin and metal contract at different rates. Often, a firm tap after freezing will pop the magnet loose.
- The Heat: If that fails, dip the part in hot (not boiling) water. Epoxy softens with heat. Use a strong magnet to pull the mistake out.
“The Magnet Sunk Too Deep”
If the hole is too deep, the magnetic pull will be weak.
- The Fix: Drop a tiny bead of Epoxy Putty or a scrap of plastic at the bottom of the hole before gluing to raise the floor.
FAQ: Frequently Asked Questions (Your Fears, Addressed)
Q: Will magnets interfere with my doll’s face-up or stain the resin over time?
A: Properly installed magnets pose no risk. The magnetic field is too weak to affect makeup. However, cheap magnets with poor nickel plating can corrode and leave green/grey stains. Always buy Nickel-Copper-Nickel (Ni-Cu-Ni) plated neodymium magnets from reputable hobby shops. This is why I never recommend buying random bulk magnets from generic online marketplaces. Proper storage and display also play a crucial role in preventing resin yellowing and damage.
Q: Can I magnetize a doll that already has a finished face-up?
A: Yes, but with “surgeon’s” caution. When drilling near painted areas (like inside the head for ears), wrap the entire head in cling film and secure the edges with painter’s tape (low tack) to create a physical barrier. The real risk isn’t the magnet; it’s the resin dust settling on the sealant. Work slowly, and clean meticulously with a soft, dry brush afterward.
Q: Where is the best place to buy a complete BJD magnet installation kit?
A: Look for kits sold by established BJD-focused accessory shops or model-making retailers (like those for Warhammer). A good kit should include: multiple sizes of Ni-Cu-Ni plated magnets, a pin vise with matching drill bits, and 2-part epoxy. Avoid “all-in-one” kits that contain Super Glue.
Q: Is this modification truly reversible?
A: As detailed in our troubleshooting section, yes. Because we use 2-part epoxy, the process is forgiving. Unlike super glue which fuses and chemically damages surfaces, cured epoxy can be softened with heat or contracted with cold to remove the magnet. You are left with a clean hole that can be filled with epoxy putty and sanded smooth if you ever wish to return the doll to stock condition.
Conclusion
You have just completed a reversible BJD modification that elevates your doll from a statue to a character. You faced the fear of the drill, respected the material, and came out with a cleaner, safer result.
Now, snap that new hand into place. For optimal posing, ensure your doll’s elastic is in top condition with the right BJD stringing kits.It’s time to tell your story.
Stay creative, stay safe.
— The Resin Whisperer
BJD Customization & Maintenance Series
- Your 2025 BJD Faceup Tutorial: A Pro’s Guide to Soulful Art
- How to String a BJD: A Veteran’s No-Nonsense Guide
- Pristine Resin: How to Clean a BJD Doll The Right Way
- BJD Customization: The Ultimate Guide to Personalizing Your Doll
- BJD Body Blushing: The Alchemist’s Guide to Skin That Breathes
- Make BJD Doll Eyes: An Alchemist’s Guide to Painting Soulful Gaze
- BJD Wig Styling Mastery: The Ultimate Care, Cutting & Customization Guide
- The Ultimate BJD Clothing Guide: Design, Patterns & Fit
- Ultimate BJD Storage Guide: Beat Yellowing with Pro Display Ideas
- BJD Faceup Pricing Guide: Unpacking Custom Eye Chips & Lip Blushing Costs
- Bringing Them Back to Life: Your Guide to BJD Restoration Service for Broken Fingers & Yellowed Resin
- BJD Stringing Kits: DIY Tightening for Stable, Pro Posing
- BJD Customization Services: Faceup & Full Body Blushing Guide
- BJD Body Modification: Sculpting Your Doll‘s Unique Form (2025 Guide)
- Mastering BJD Seam Sanding: A Pro’s Guide to Flawless Resin Finishes
- BJD Joint Maintenance: Keeping Your Doll Posing Perfectly for Years
- BJD Eye Well Modification: Achieving Deeper, More Expressive Gaze
- Mastering Advanced BJD Faceups: Beyond Basics to Lifelike Artistry
- BJD Resin Whitening & Anti-Yellowing: A Collector’s Proven Guide to Preserve Beauty
- BJD Stringing Tension Guide: Optimizing Posing & Stability
- BJD Magnet Installation: The Ultimate Safety Guide to Unlocking Dynamic Posing (You are here)